Home / Blog / Deploy NodeJs Application in EC2 with HTTPS(SSL) and CI/CD : A Comprehensive Guide
Deploy NodeJs Application in EC2 with HTTPS(SSL) and CI/CD : A Comprehensive Guide


Learn how to deploy a Node.js application on AWS EC2 with HTTPS for secure connections and implement a CI/CD pipeline for seamless updates. This step-by-step guide covers everything from setting up your EC2 instance and installing Node.js, to configuring NGINX for HTTPS and SSL certificates, and automating your deployment process using popular CI/CD tools. Perfect for developers looking to streamline their deployment process and enhance security.
A step by step guide to deploy nodejs application in Aws EC2 instance and Setting up nginx for proxy pass to different ports and enabling HTTPS for secure connections.
Steps to be followed through out the article : -
Setup EC2 Instance
- Launch a new ec2 instance
- Setting up security group as per the PORT, our server going to run
- Connect to ec2 instance
- Install NodeJs and Other necessary tools
Setup CI/CD pipeline
- Setting up github actions runner in EC2
- Create a github workflow in our repository
Setup NGINX, PM2 and Custom Domain
- Install Nginx in Ubuntu
- Set up configuration file to handle specific port
- Run our server with pm2
Enable HTTPS(SSL) with Certbot
- Install Certbot
- Register our domain for SSL certificate
- Enable auto renewal in 90days interval
Before staring you need an active aws account to follow the steps.
Setup EC2 Instance
Head over to Aws and search for EC2 and click on launch instance, there give it a name an choose Ubuntu as operating system.
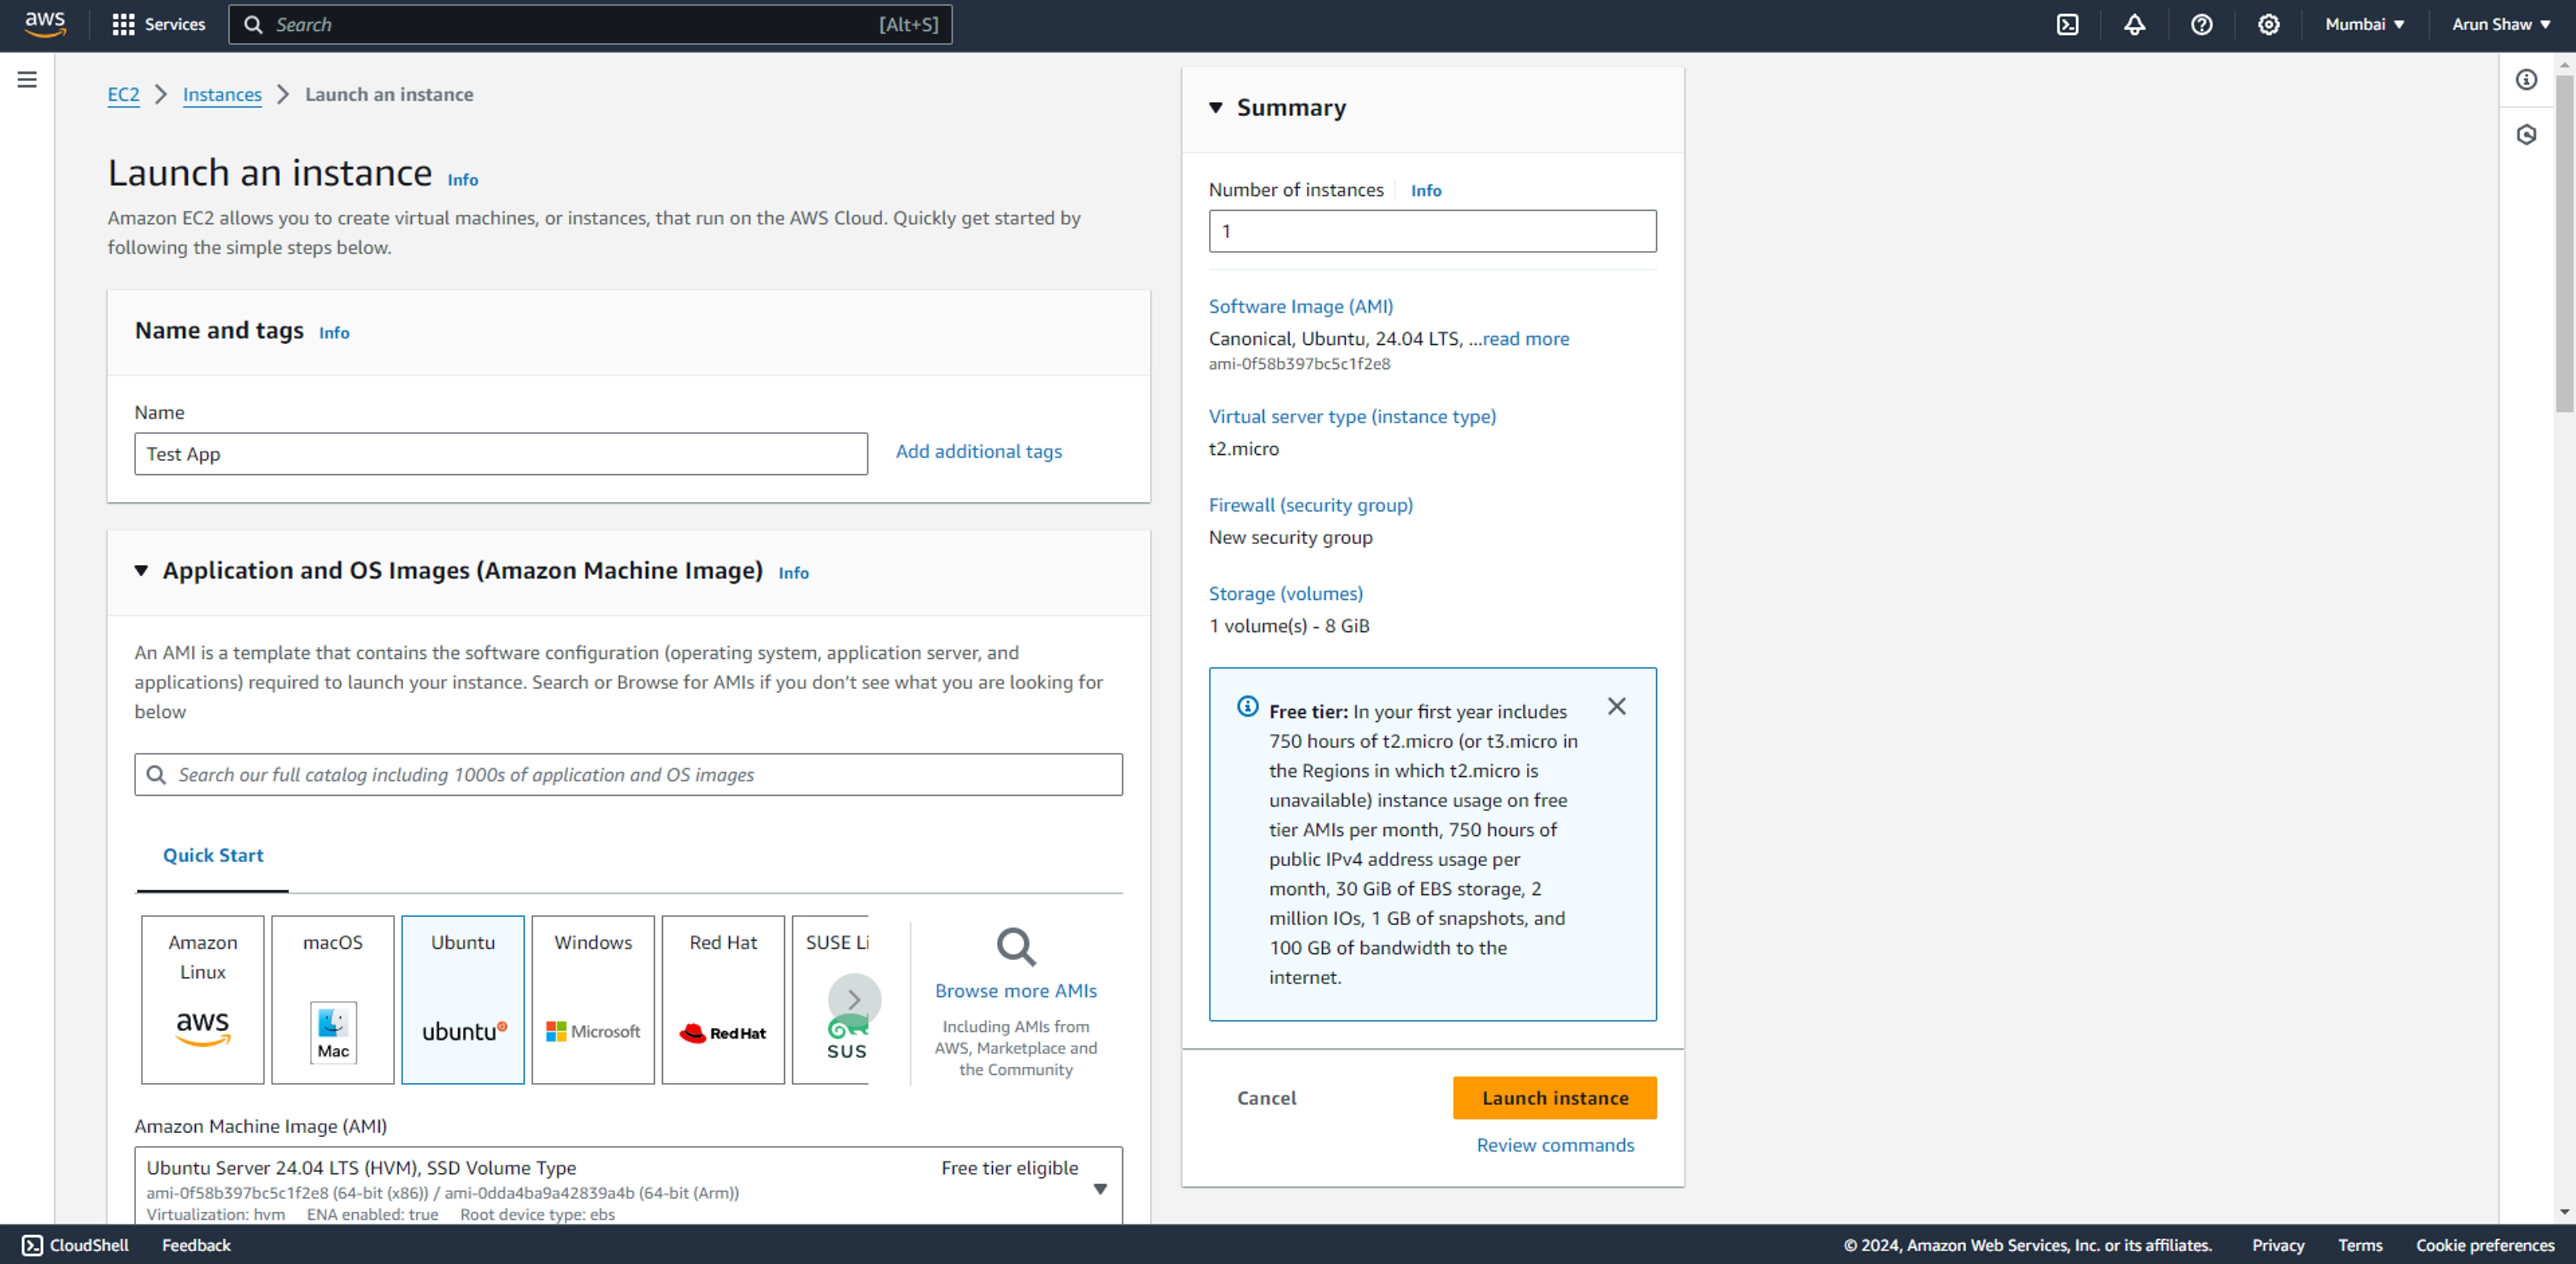
Click on create new key pair

Finally click on launch instance, it will create new Ubuntu machine and it take 2-3 minutes to boot then we can connect to it.
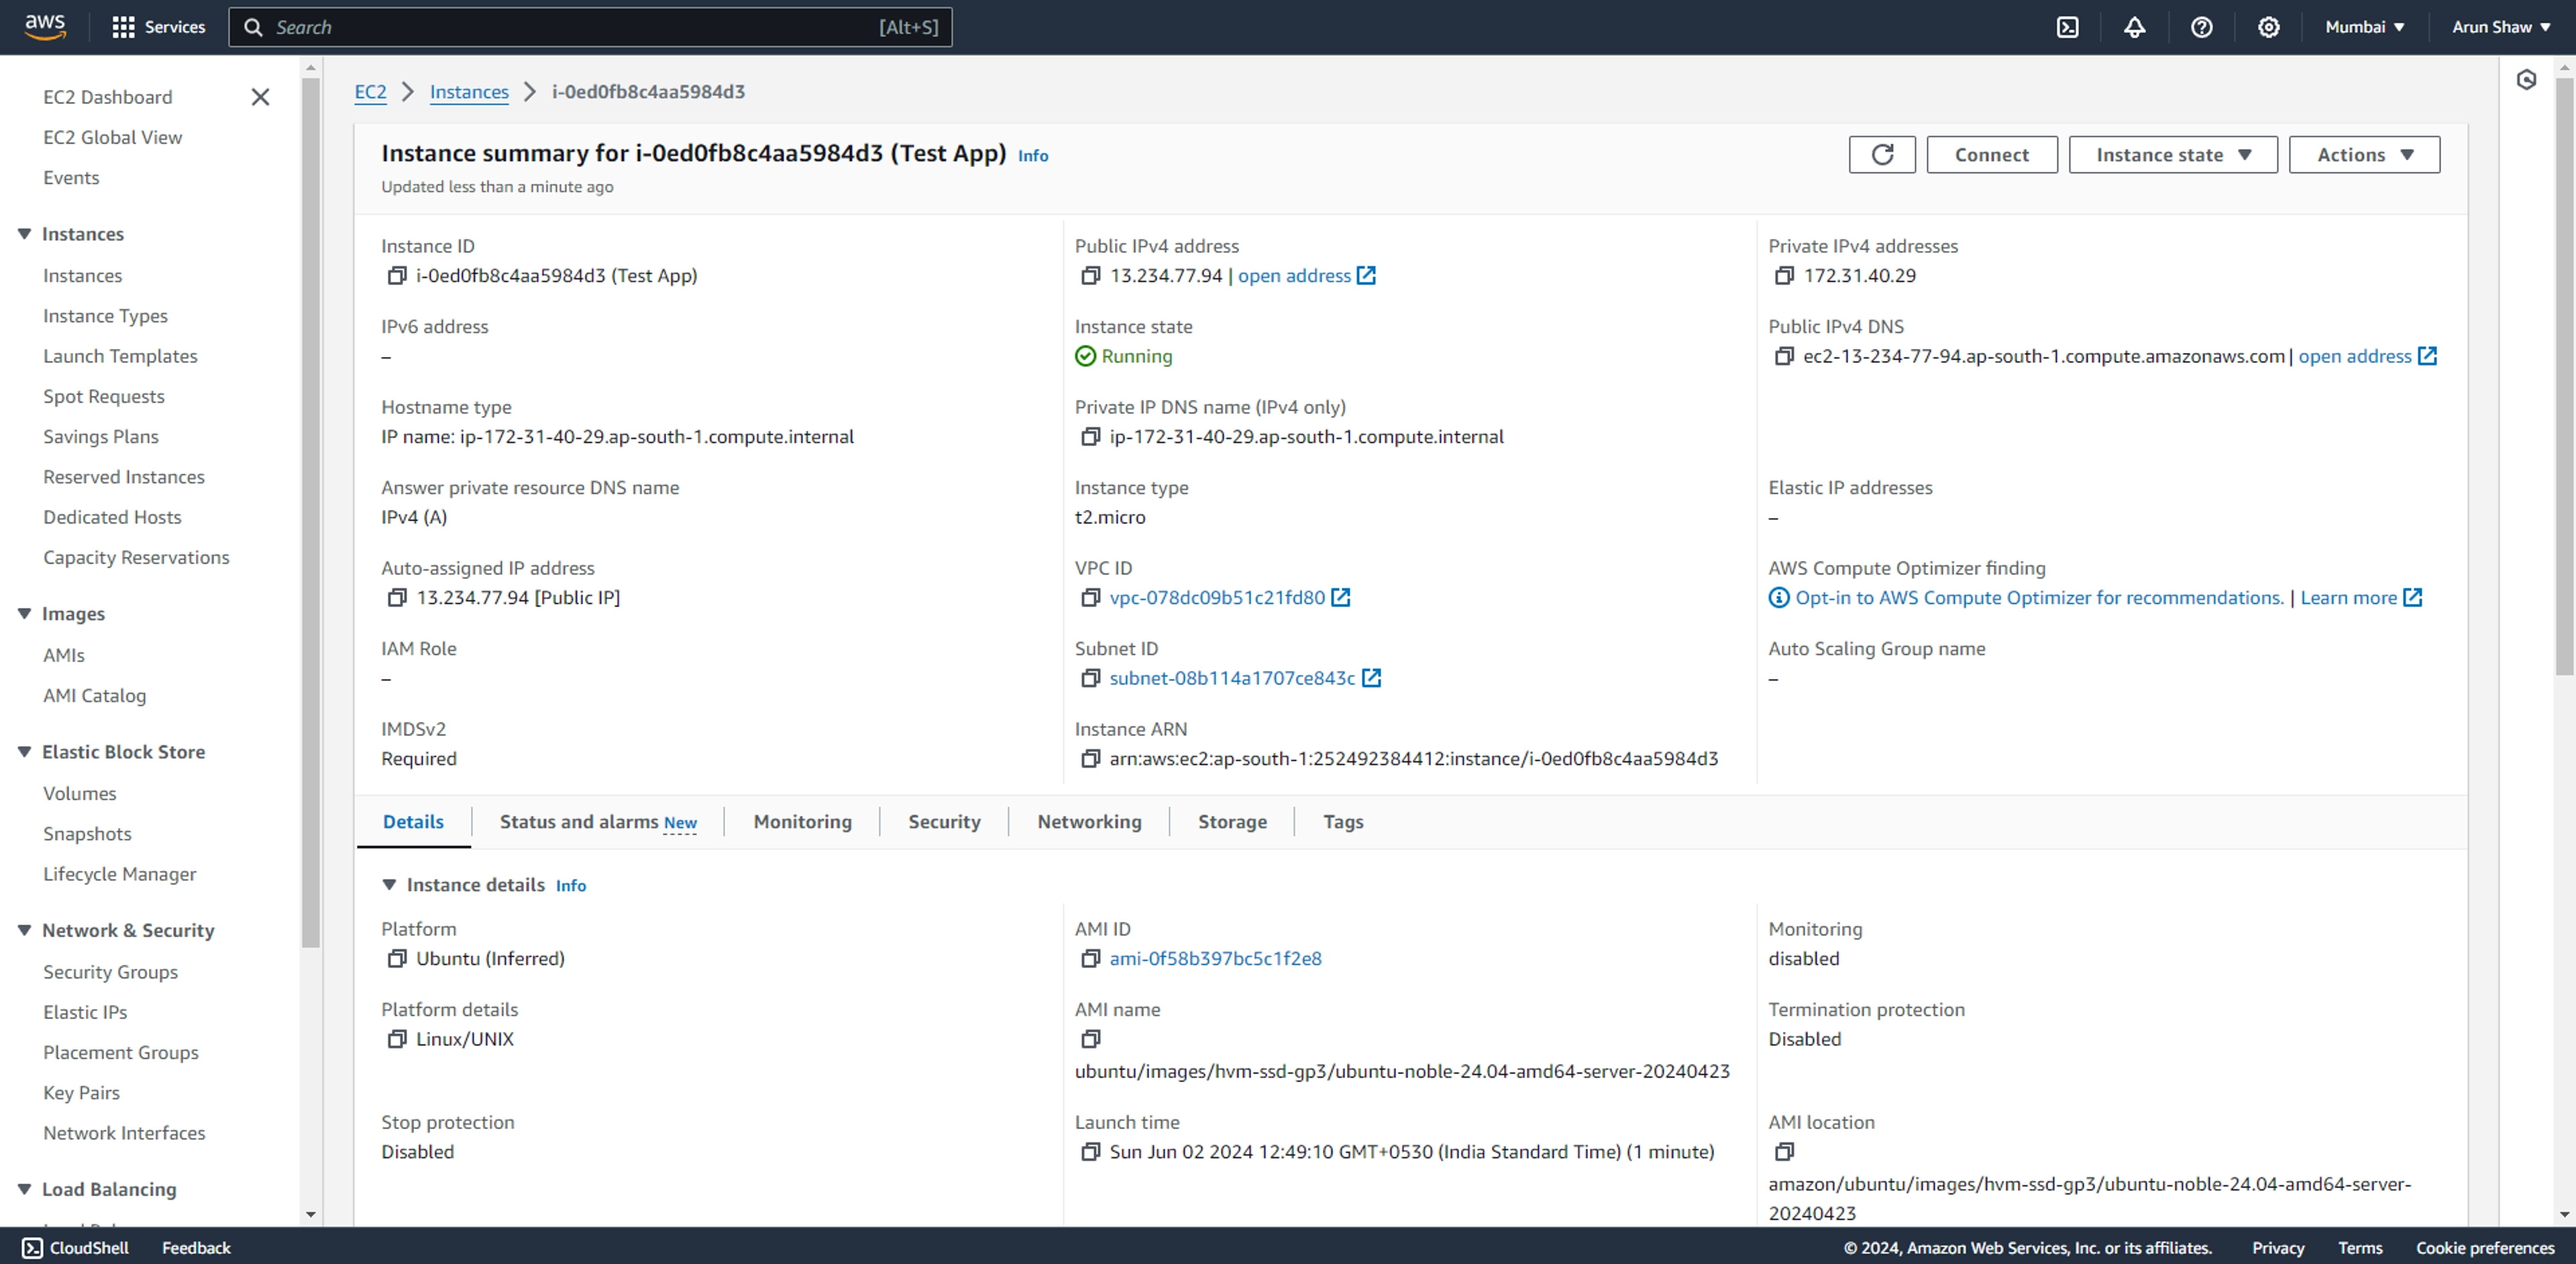
Now got instances and choose the one the you just created
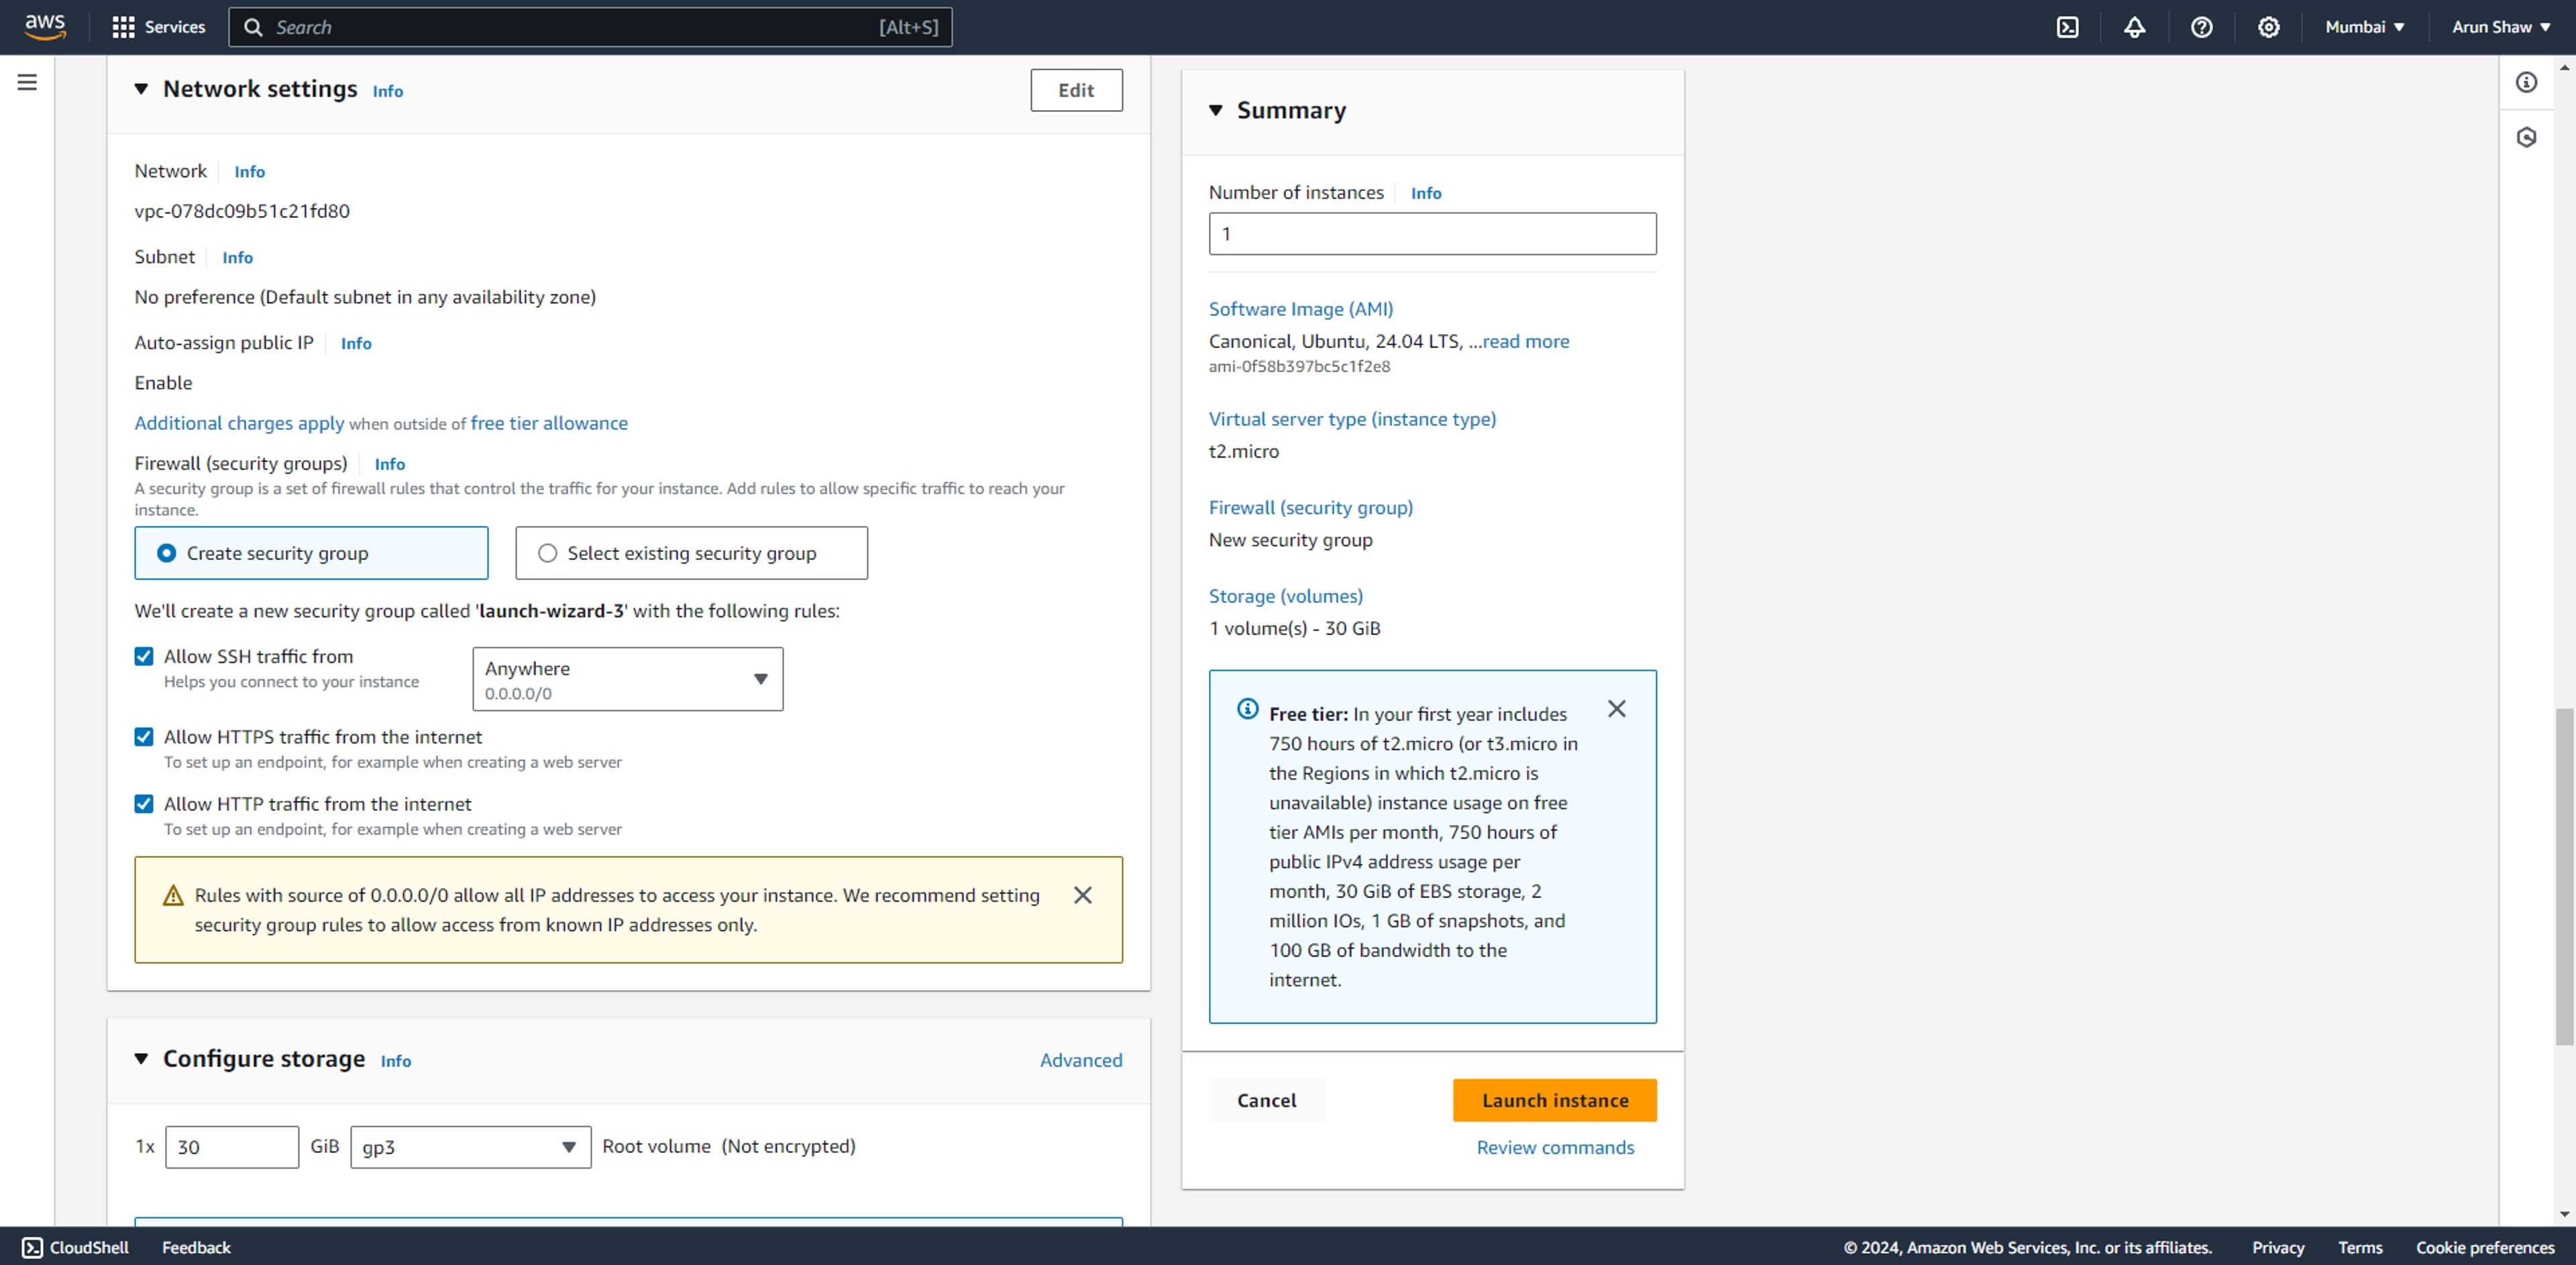
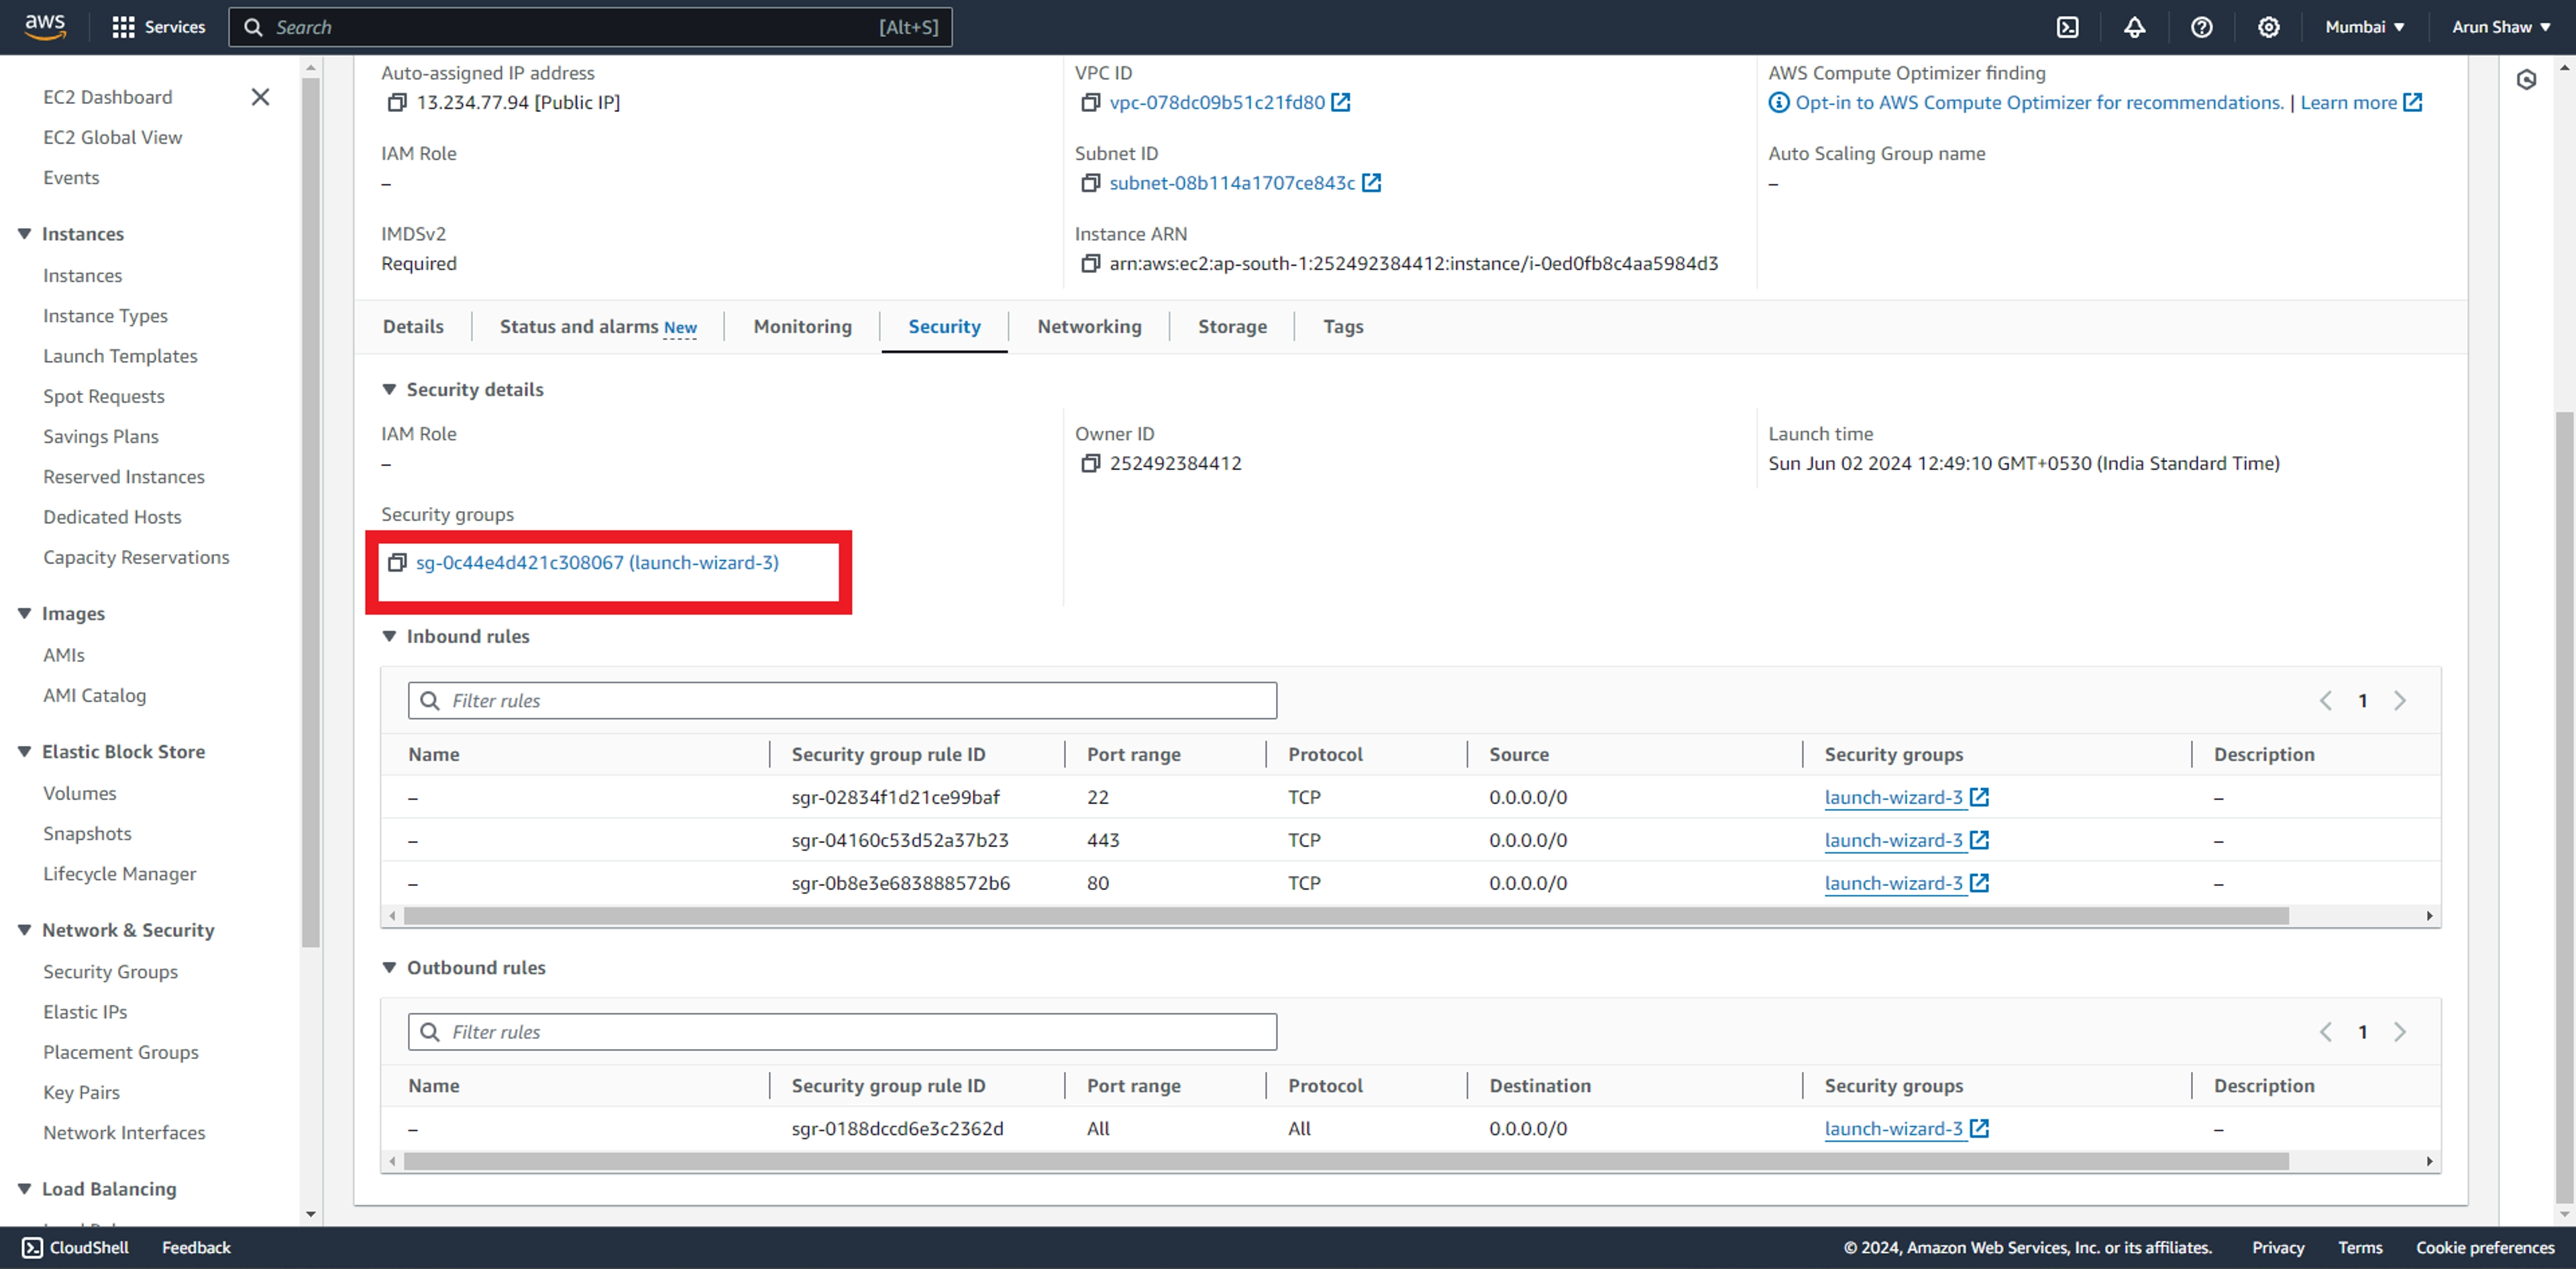
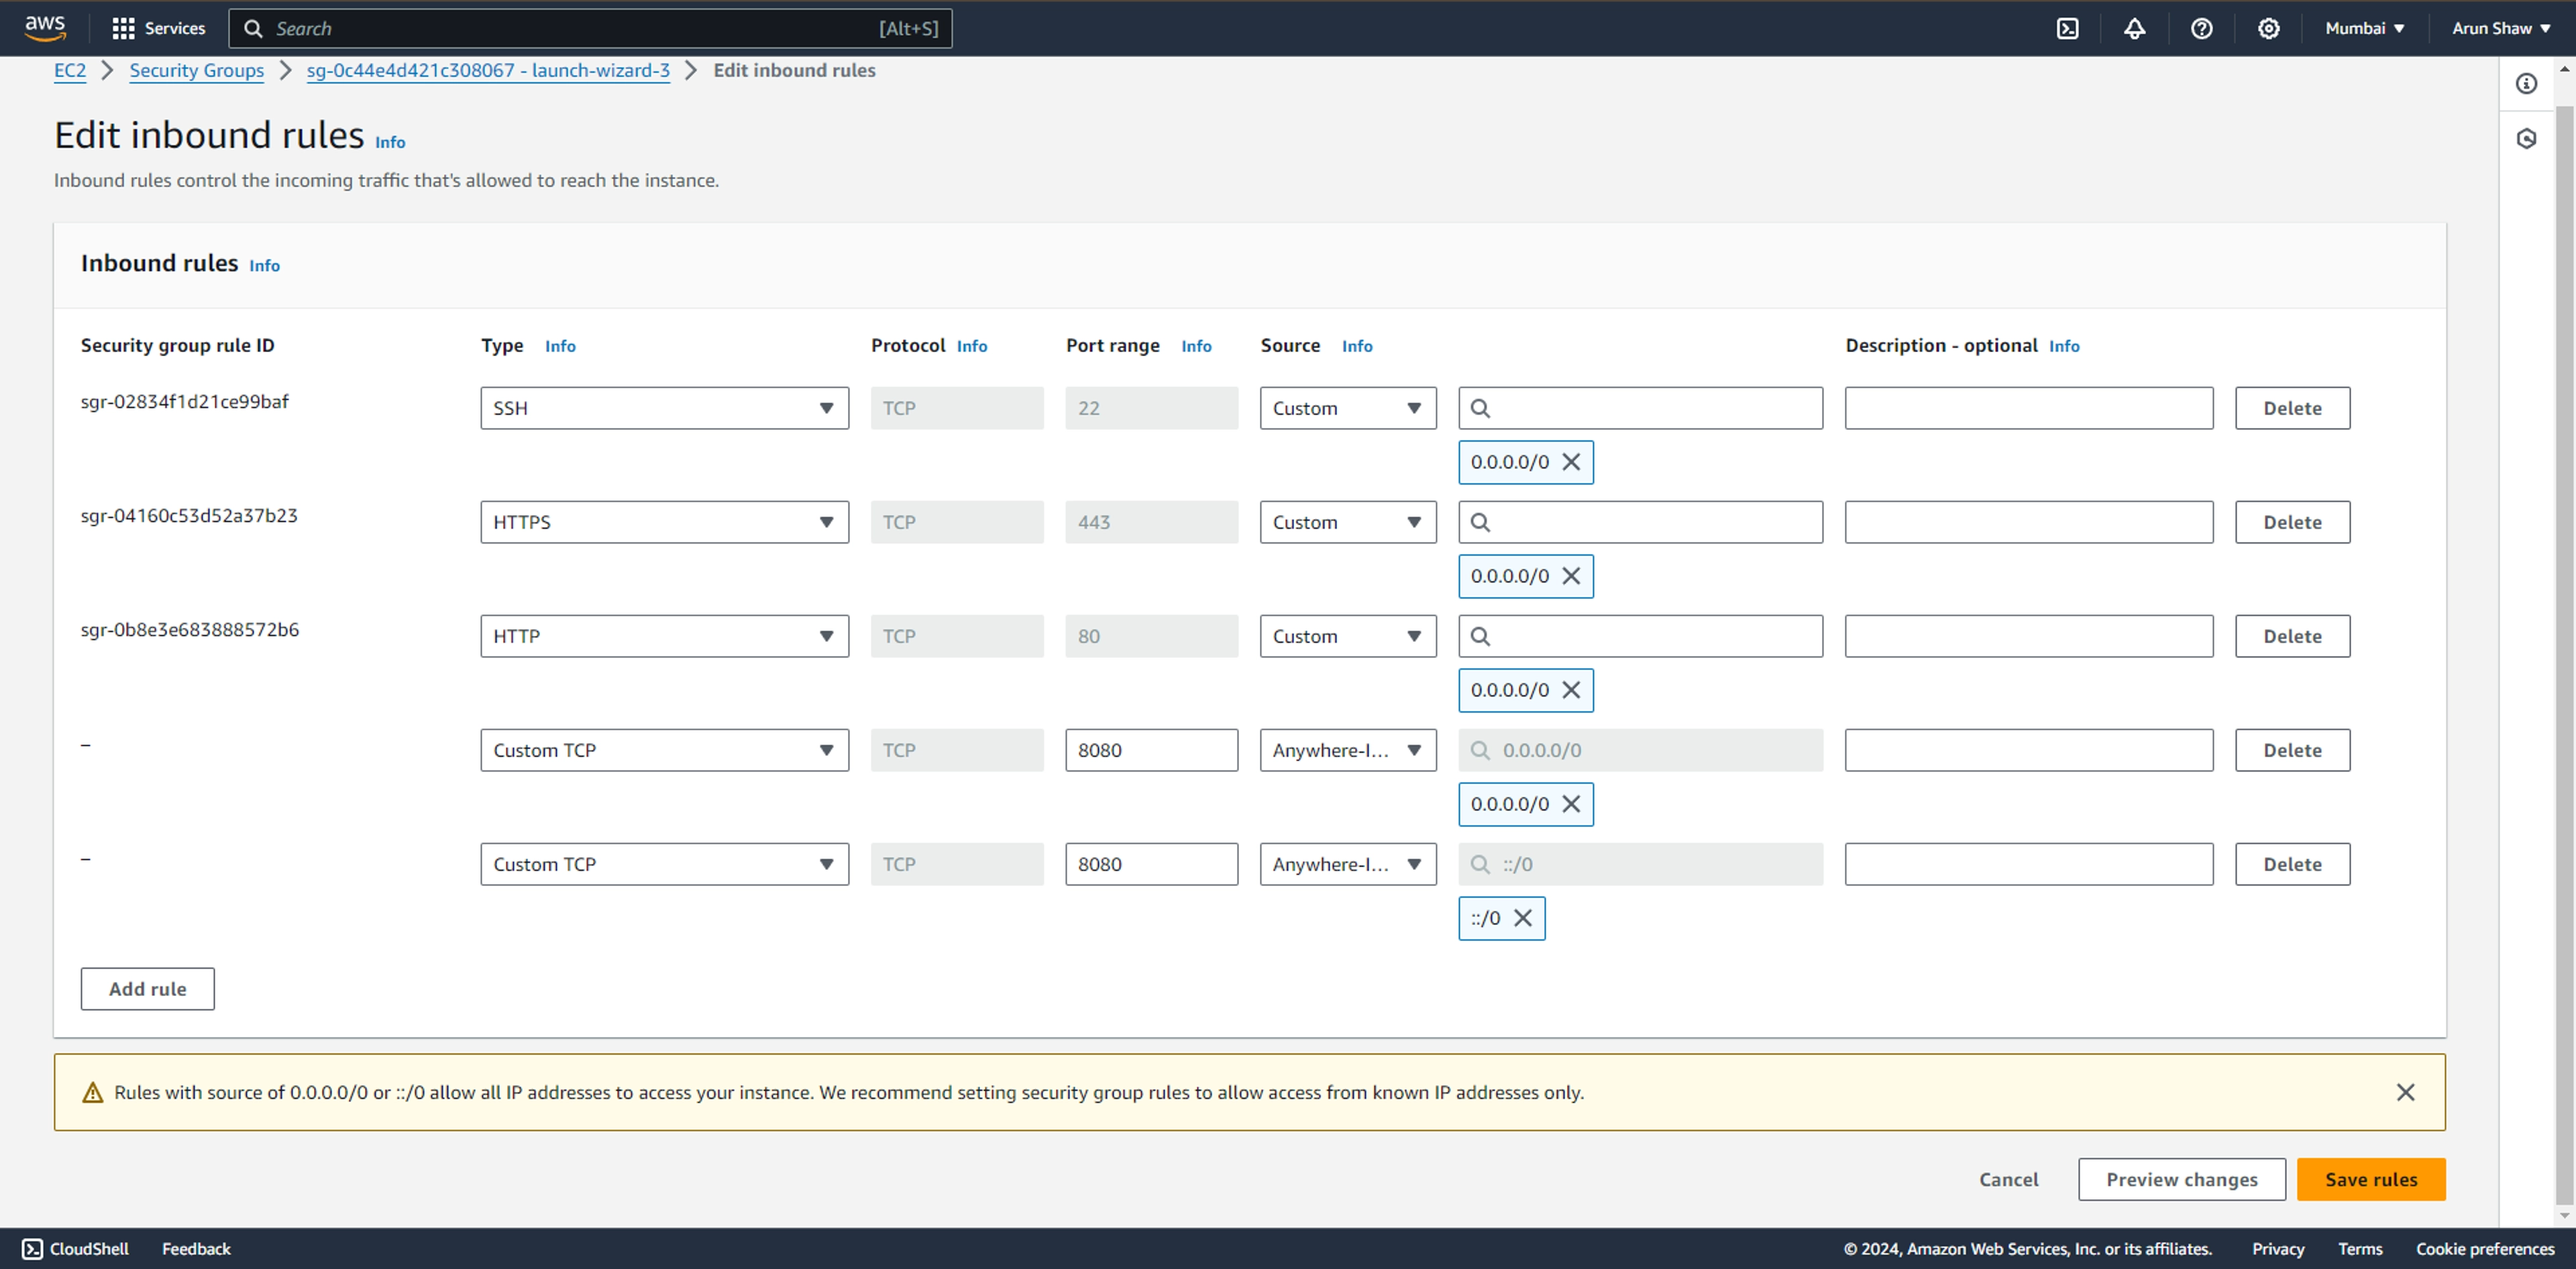
Let setup security group as per our PORT preference. Go to security tab anc click on the id under security group and click on edit inbound rules
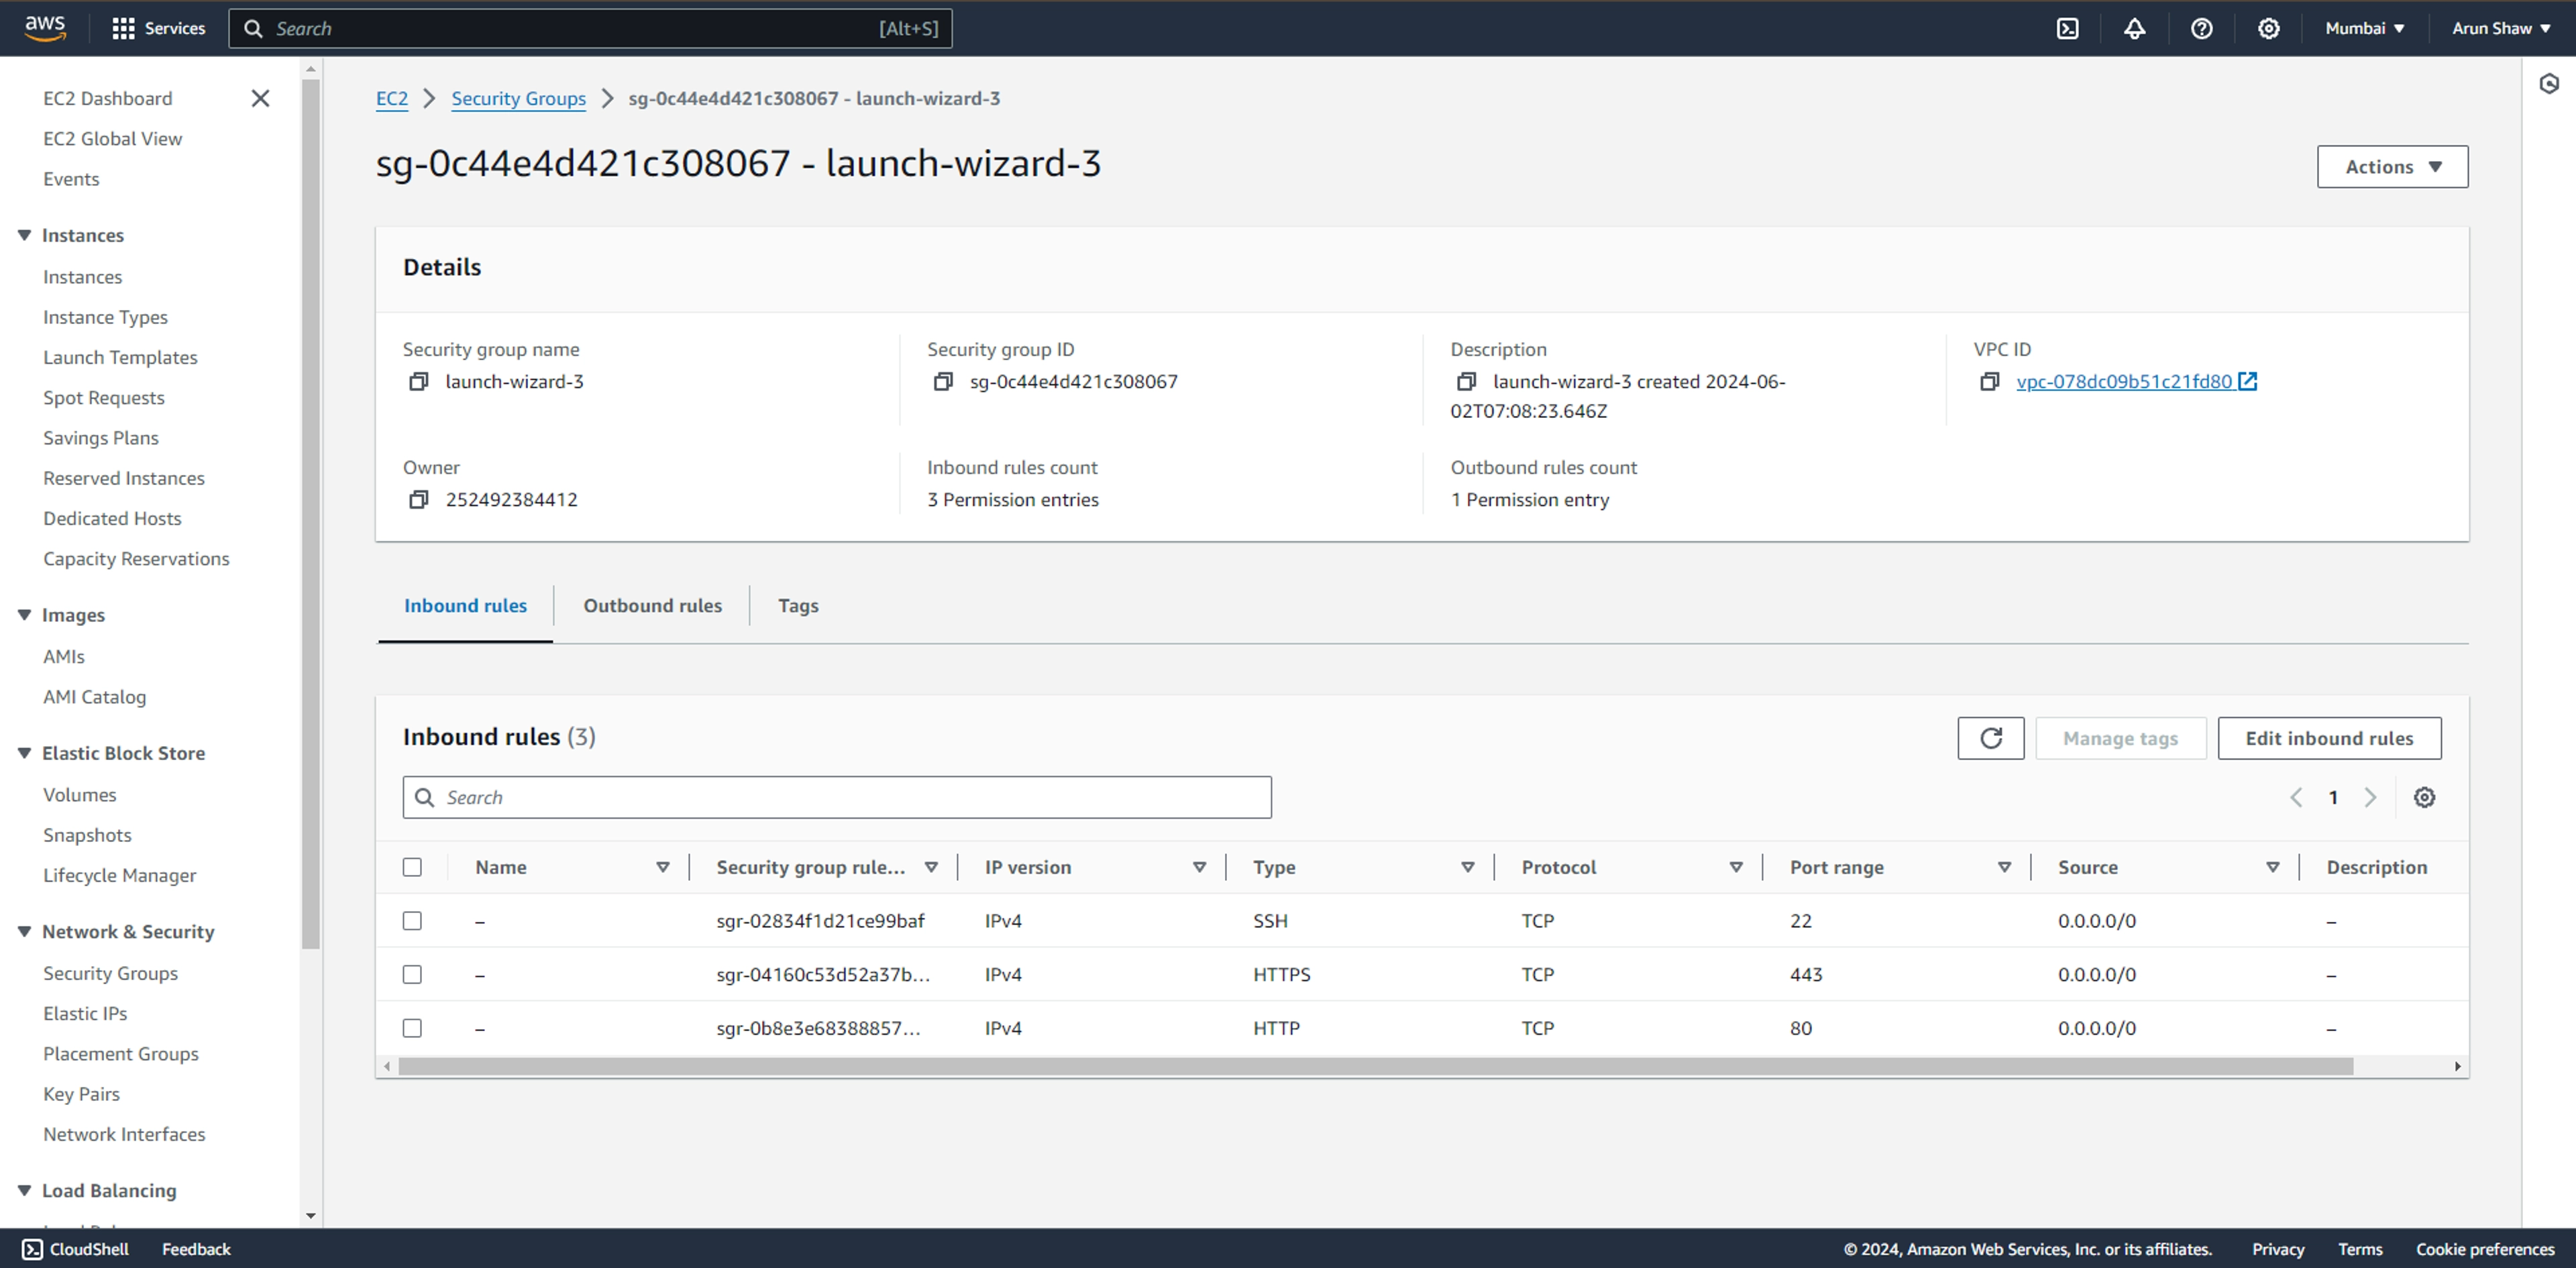
Under port range give your port name
Now got to your instance and click on connect to connect with the ec2 instance
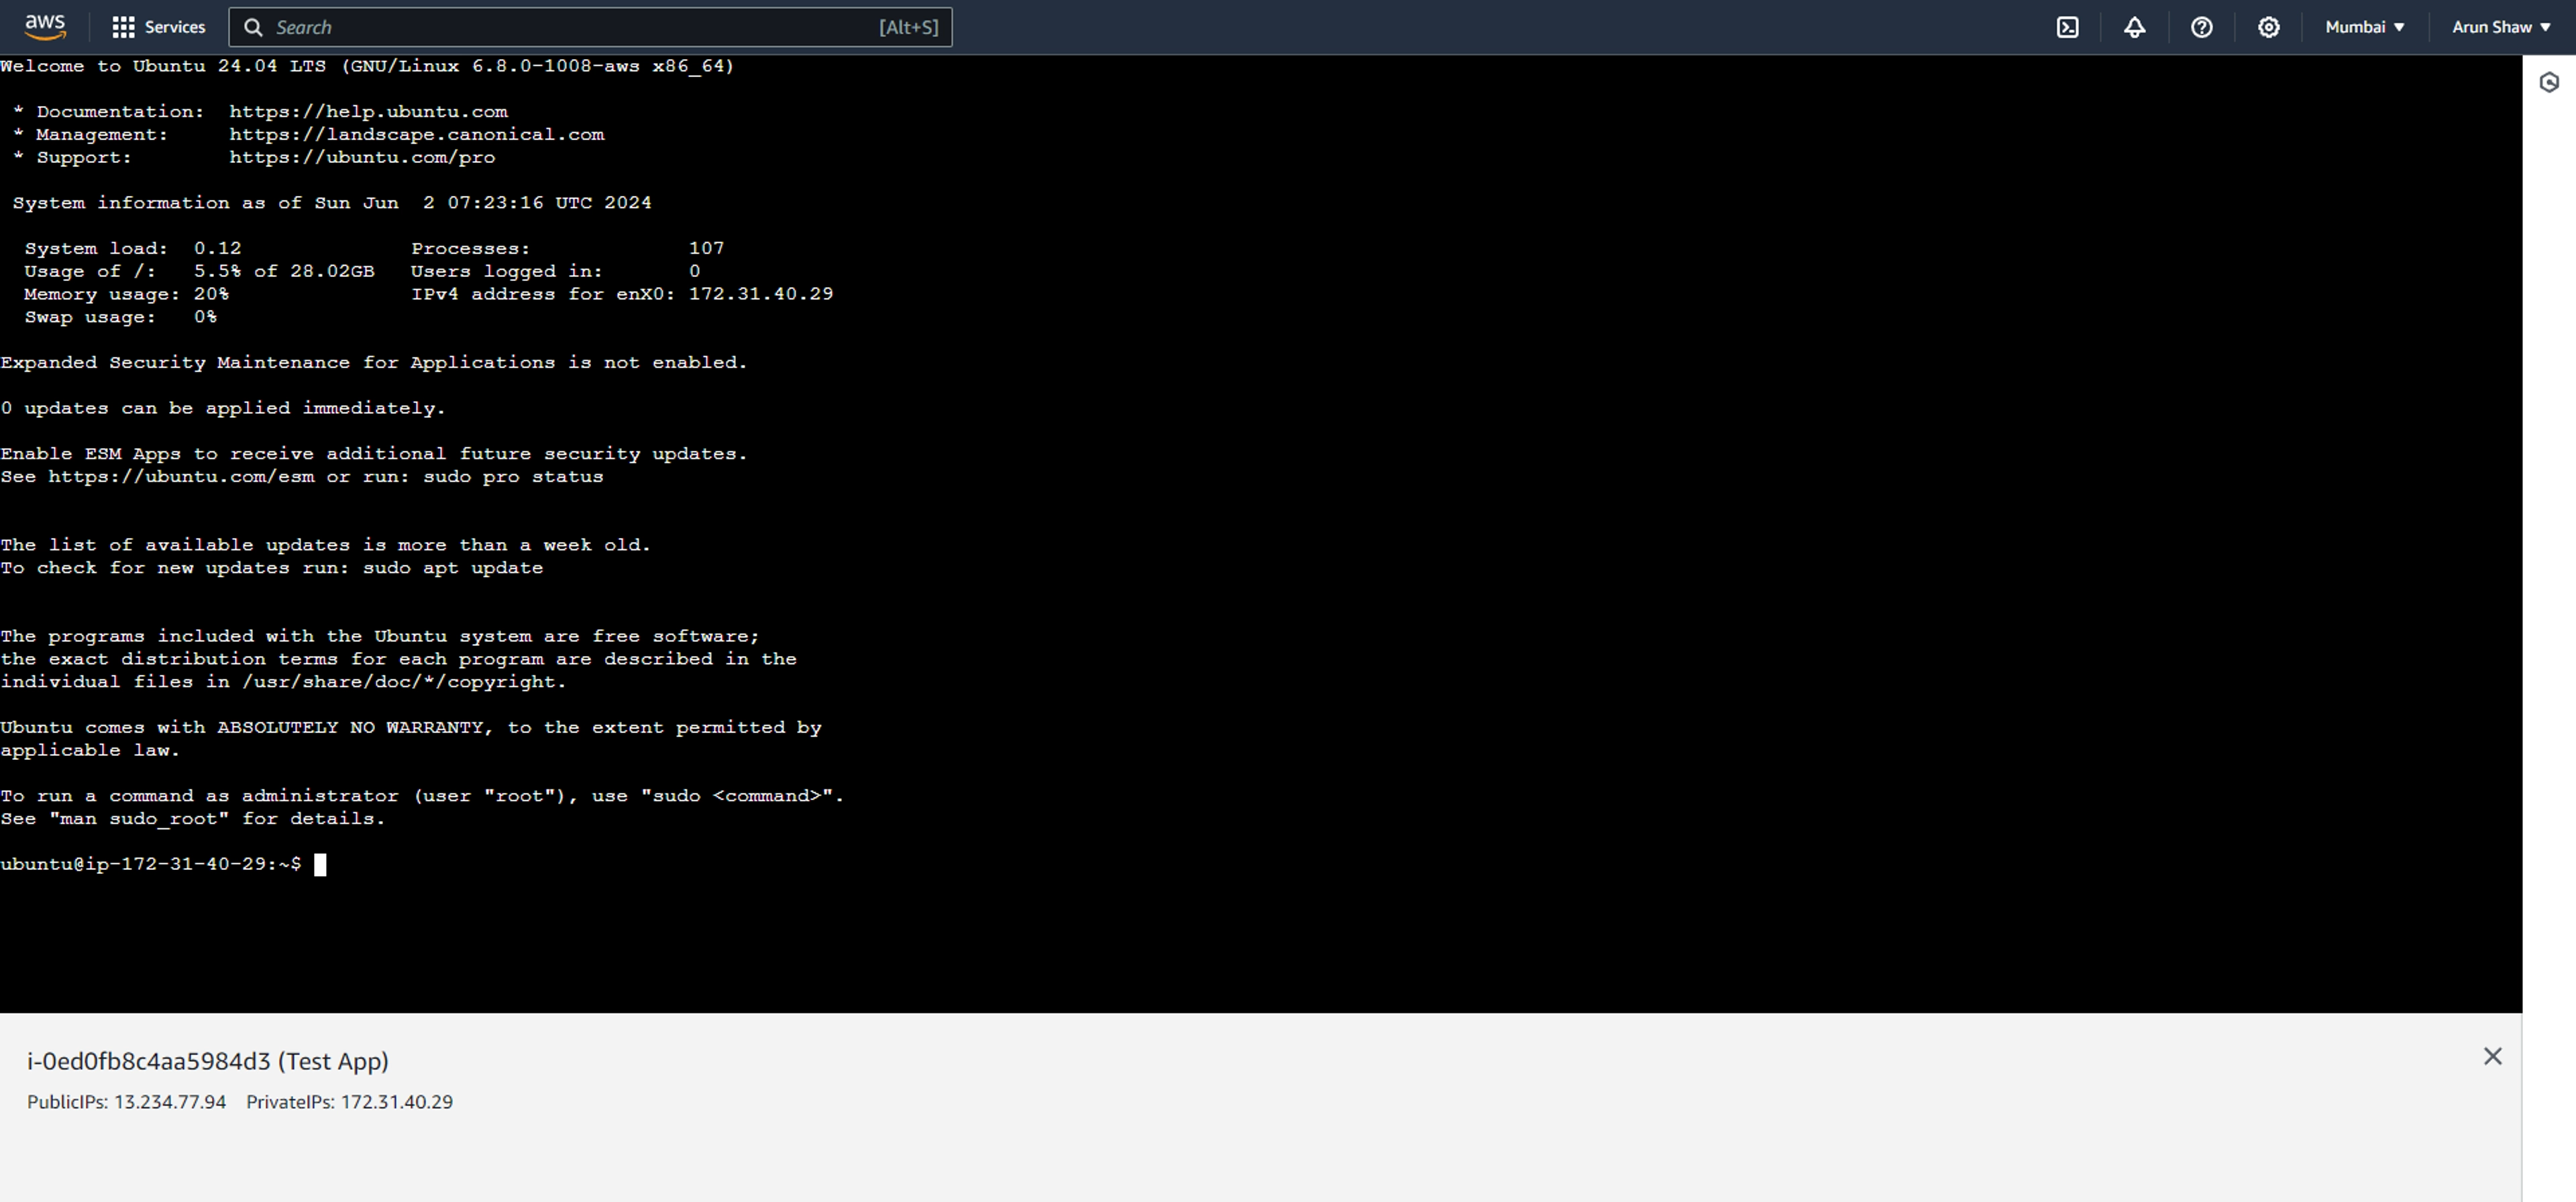
now lets update out system and all tools with the below command
sudo apt-get update sudo apt-get upgrade After finishing the update now lets install NodeJs
curl -o- https://raw.githubusercontent.com/nvm-sh/nvm/v0.39.7/install.sh | bash source .bashrc nvm install 20 // you can add your preferred version of node instead of 20 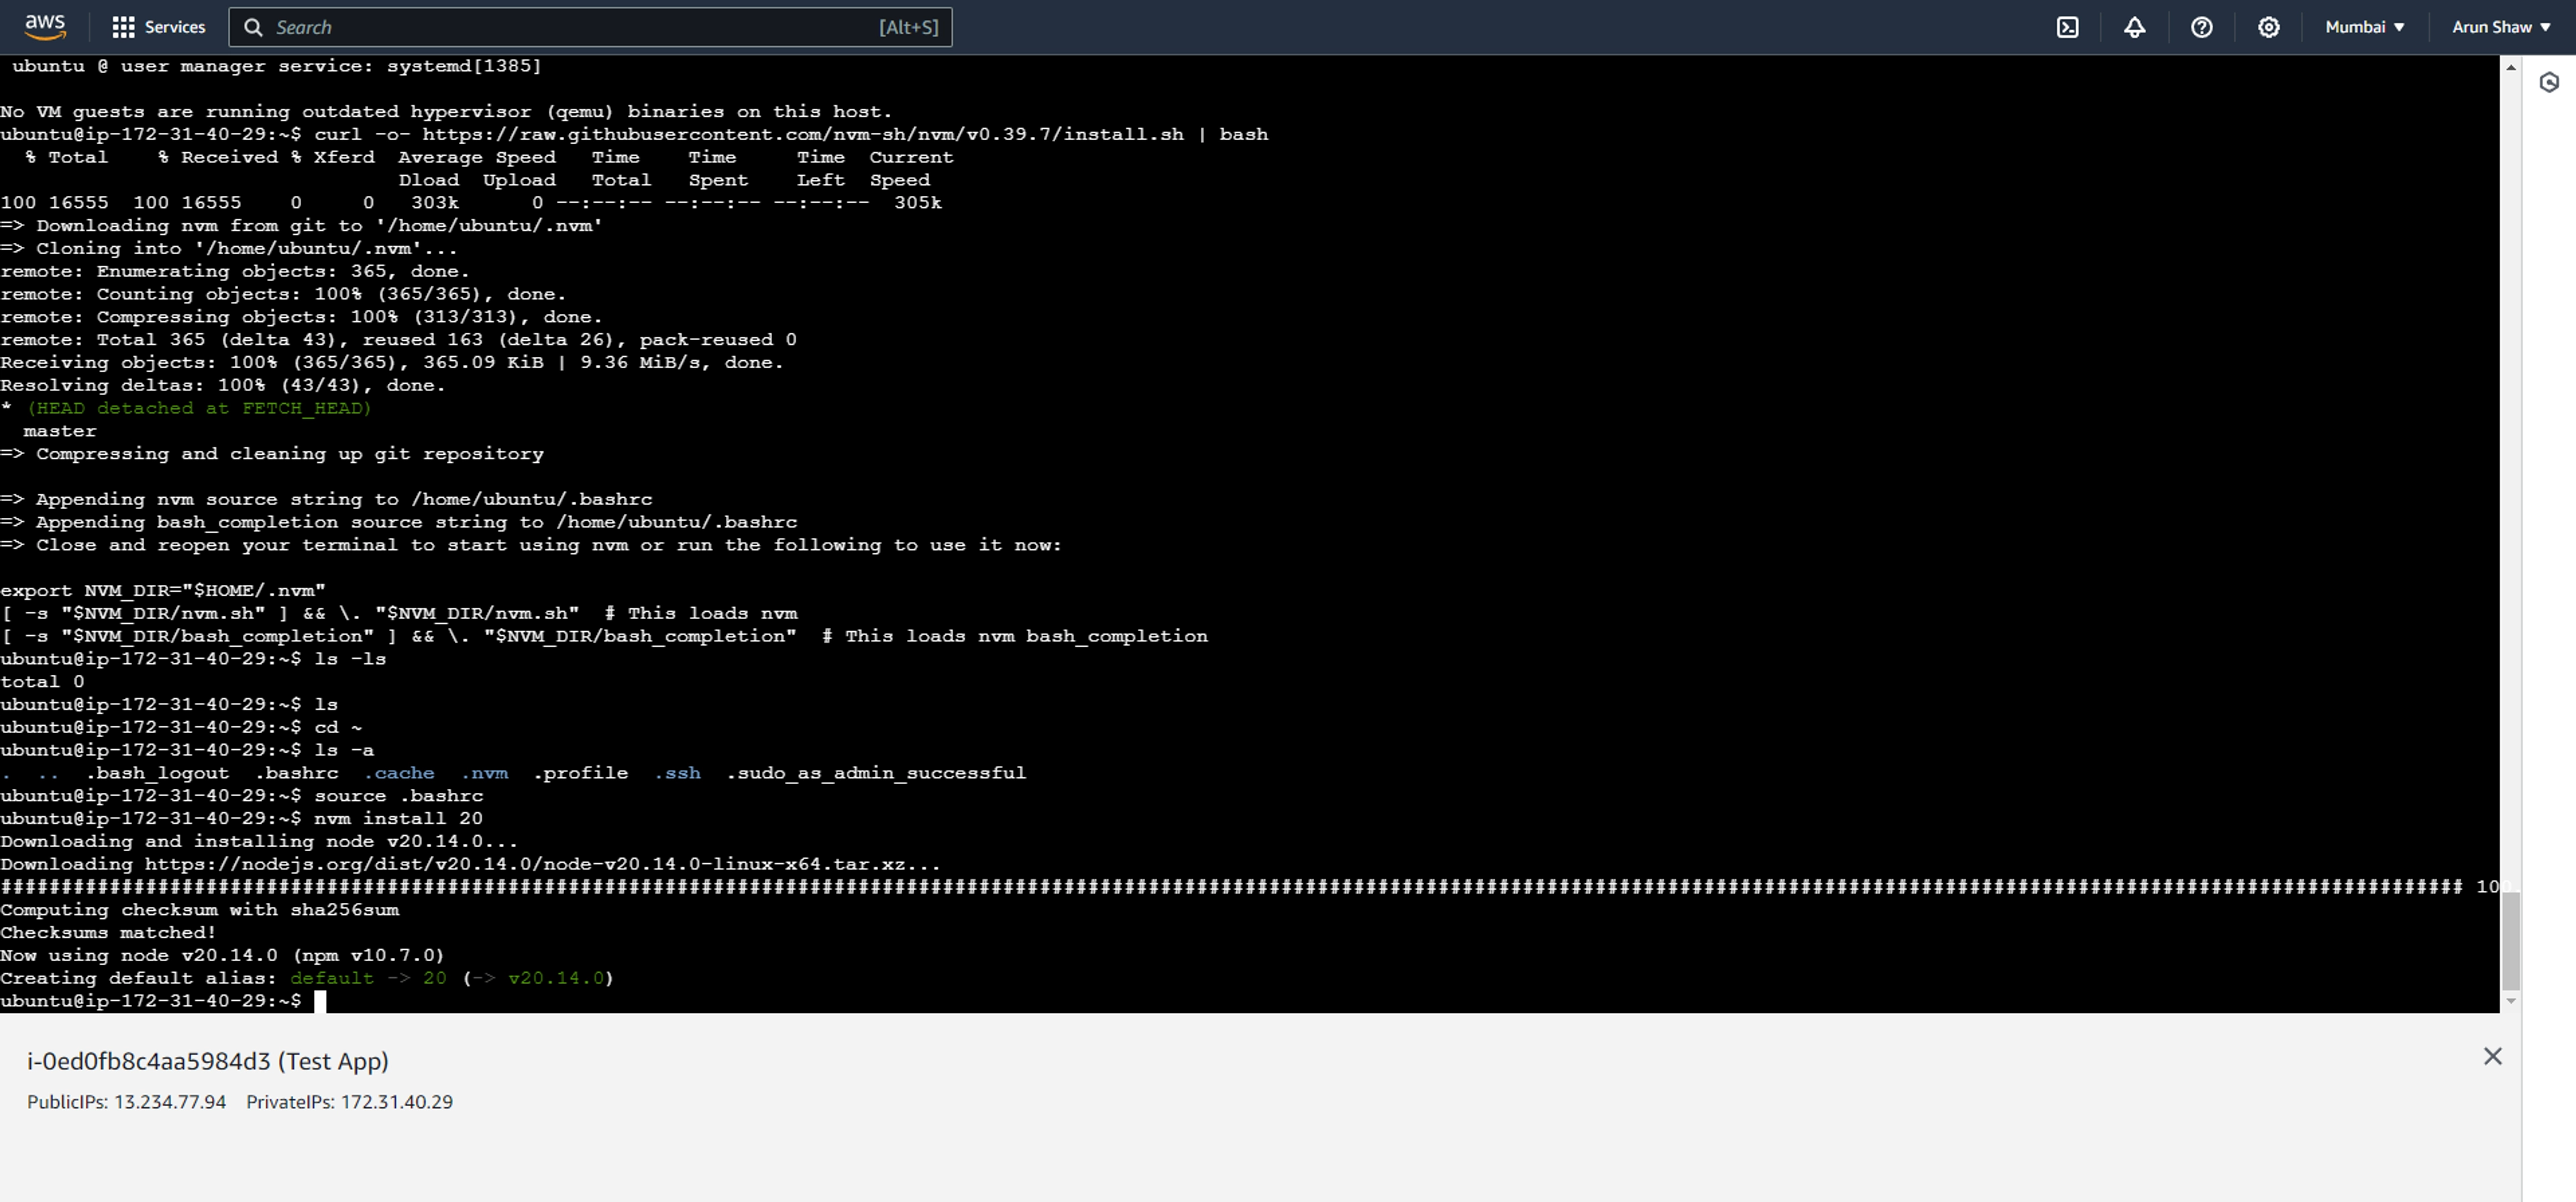
Setup CI/CD pipeline
lets setup ci/cd pipeline to auto deploy out nodejs app when we push into github.
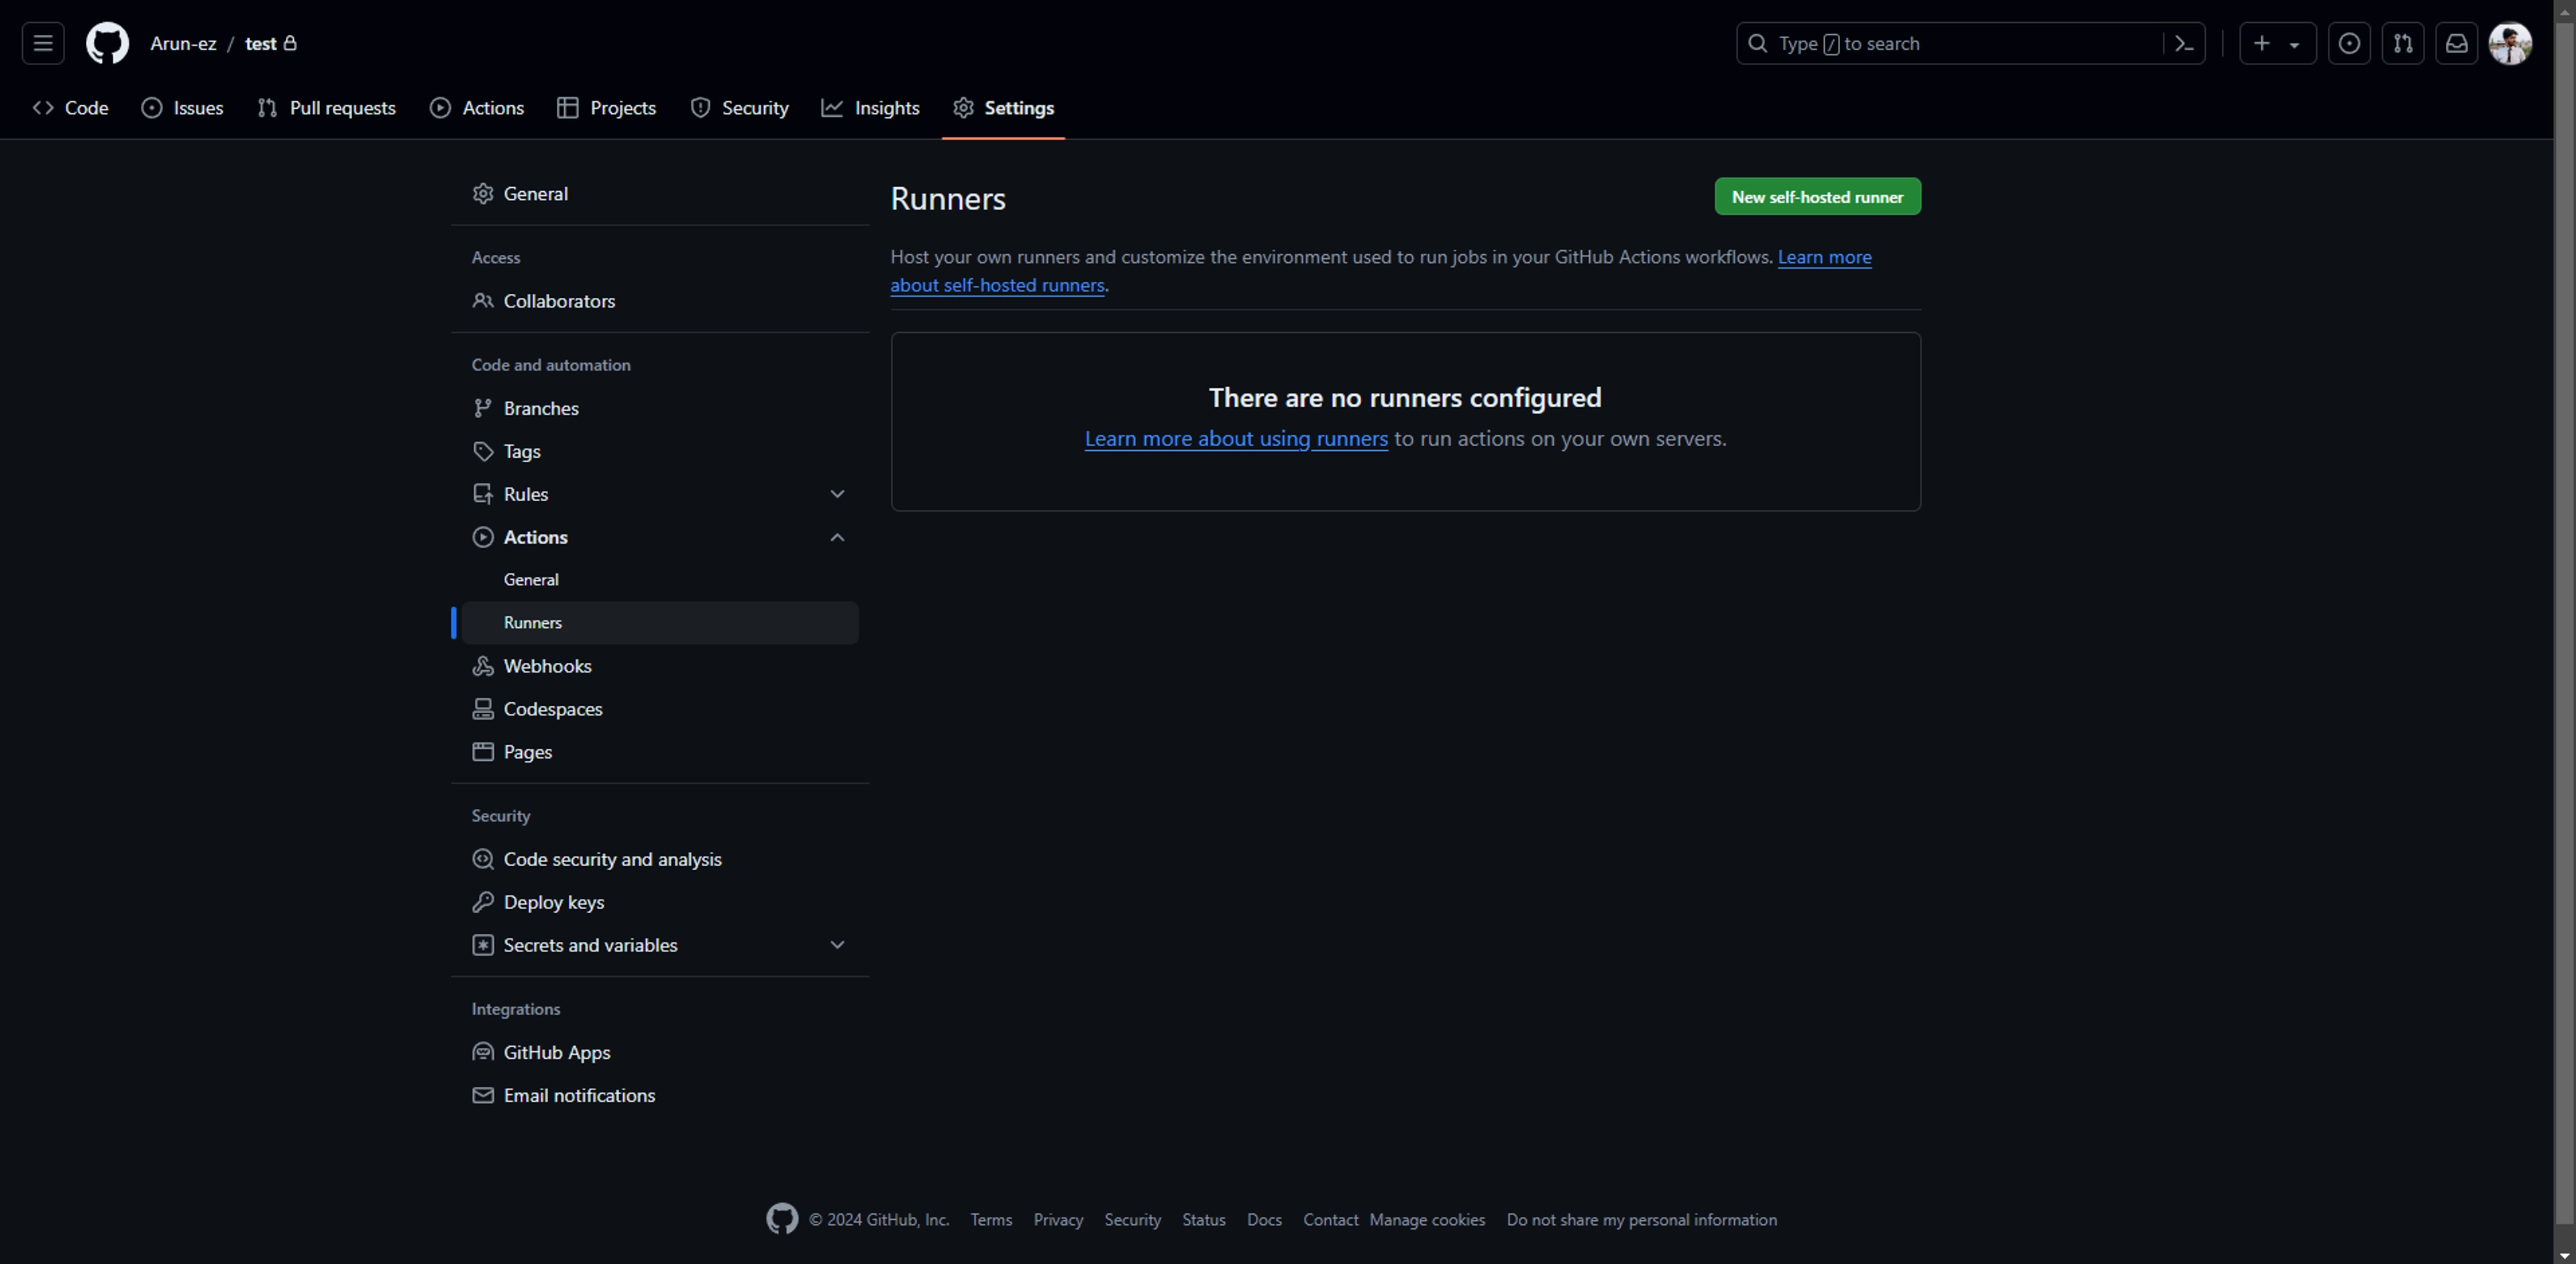
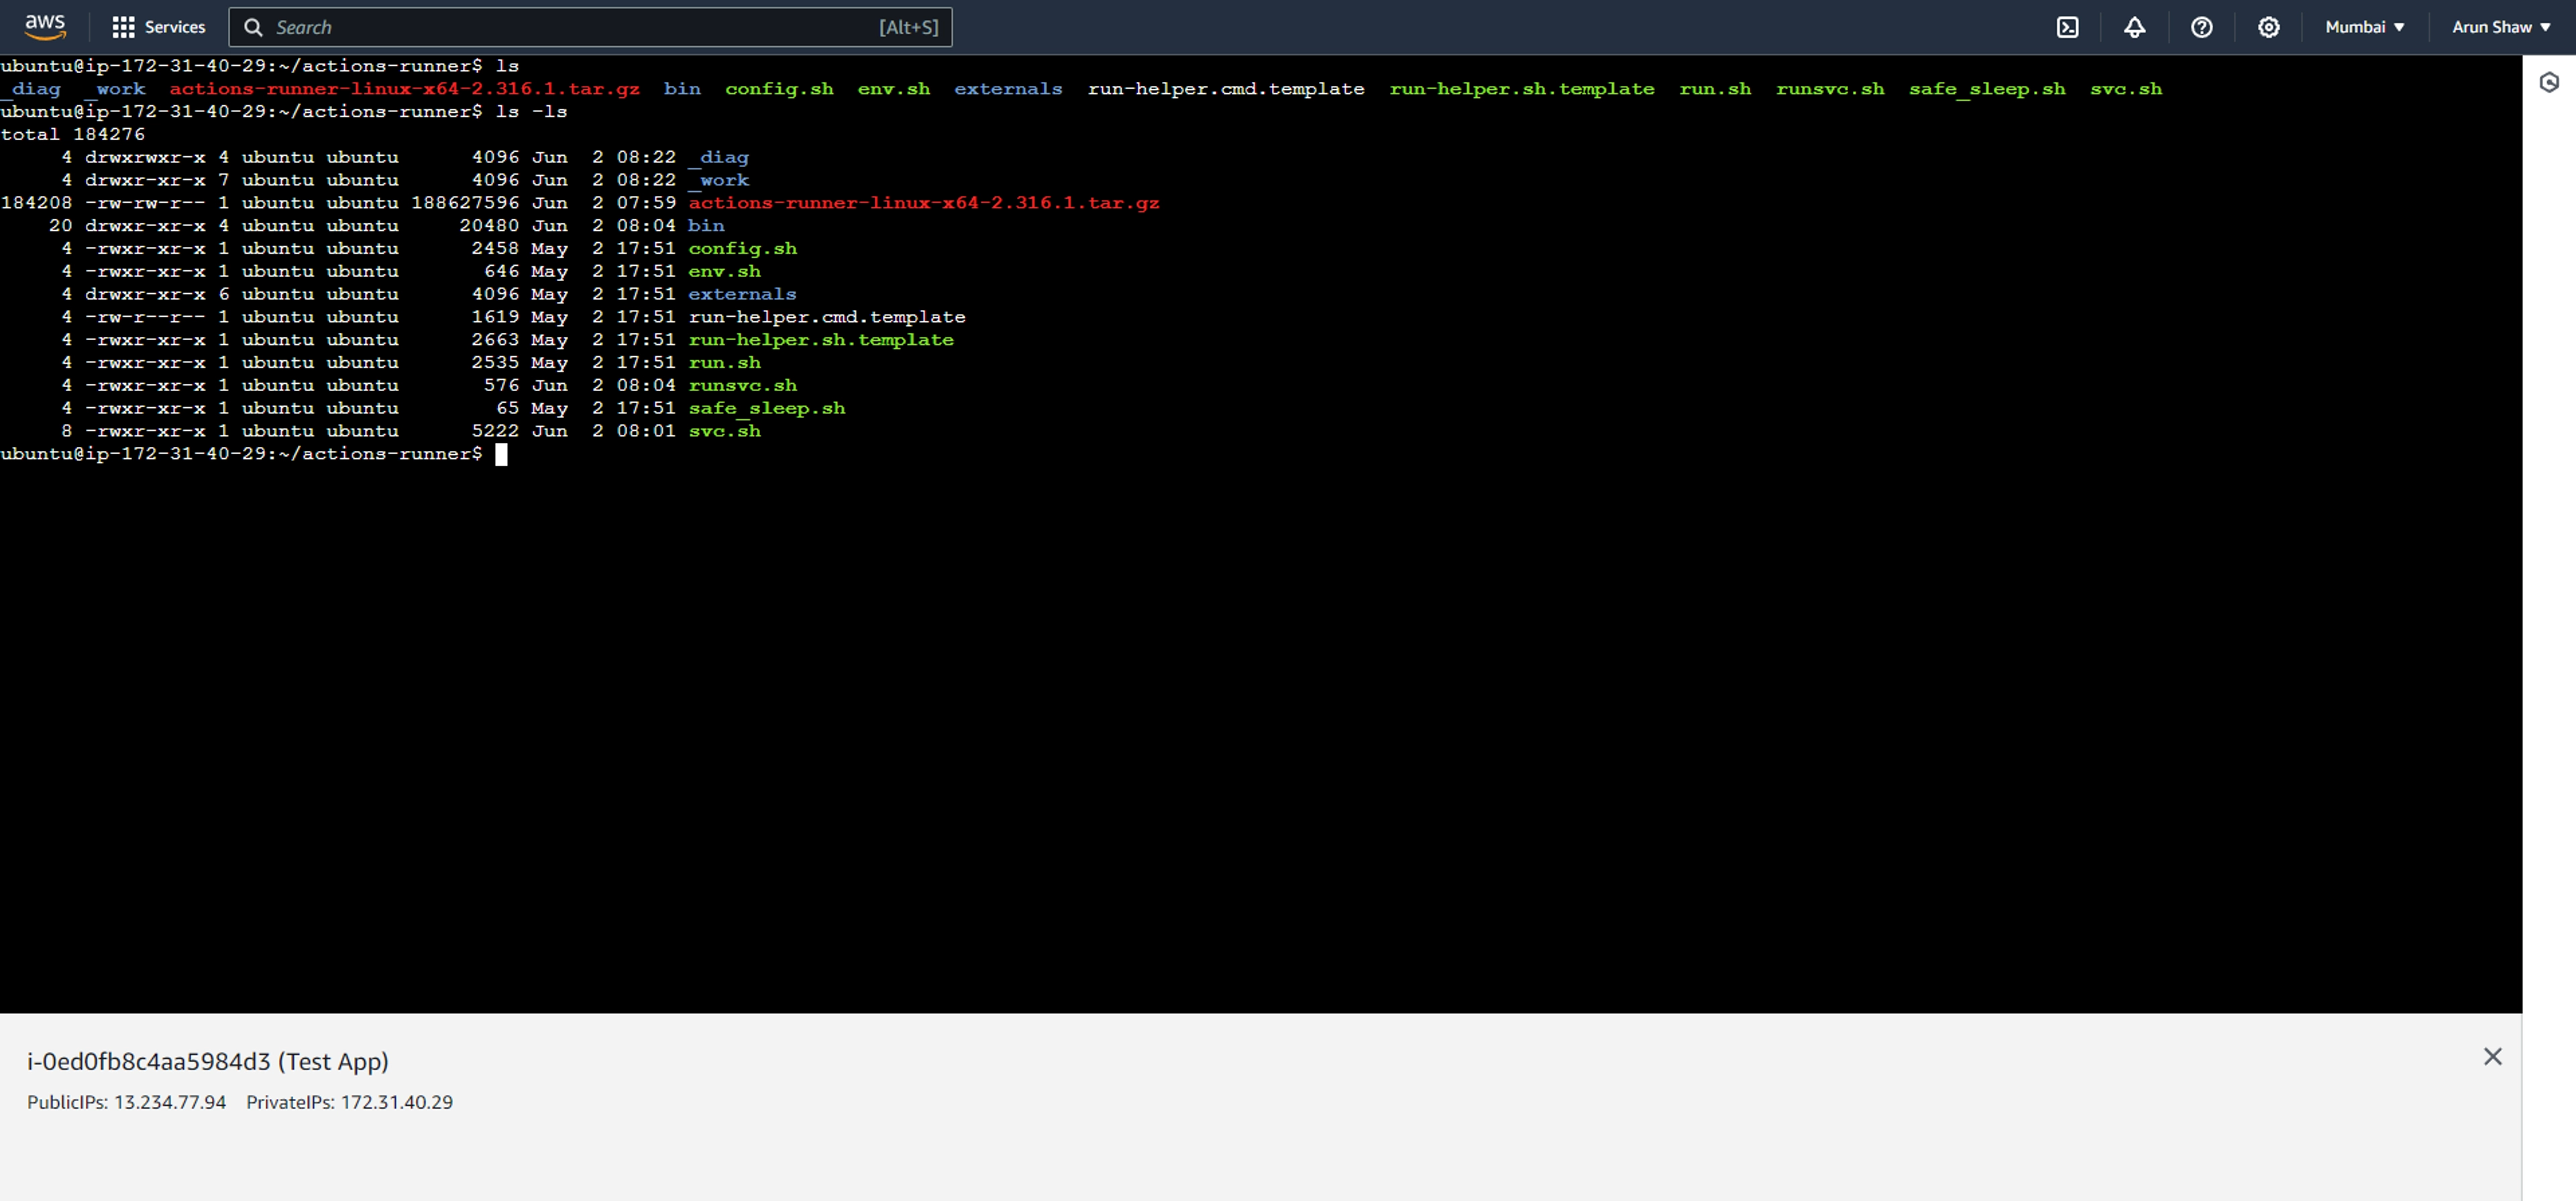
Go to your preferred github repository and go to Settings > Actions > Runners and click on New self-hosted runner and select linux
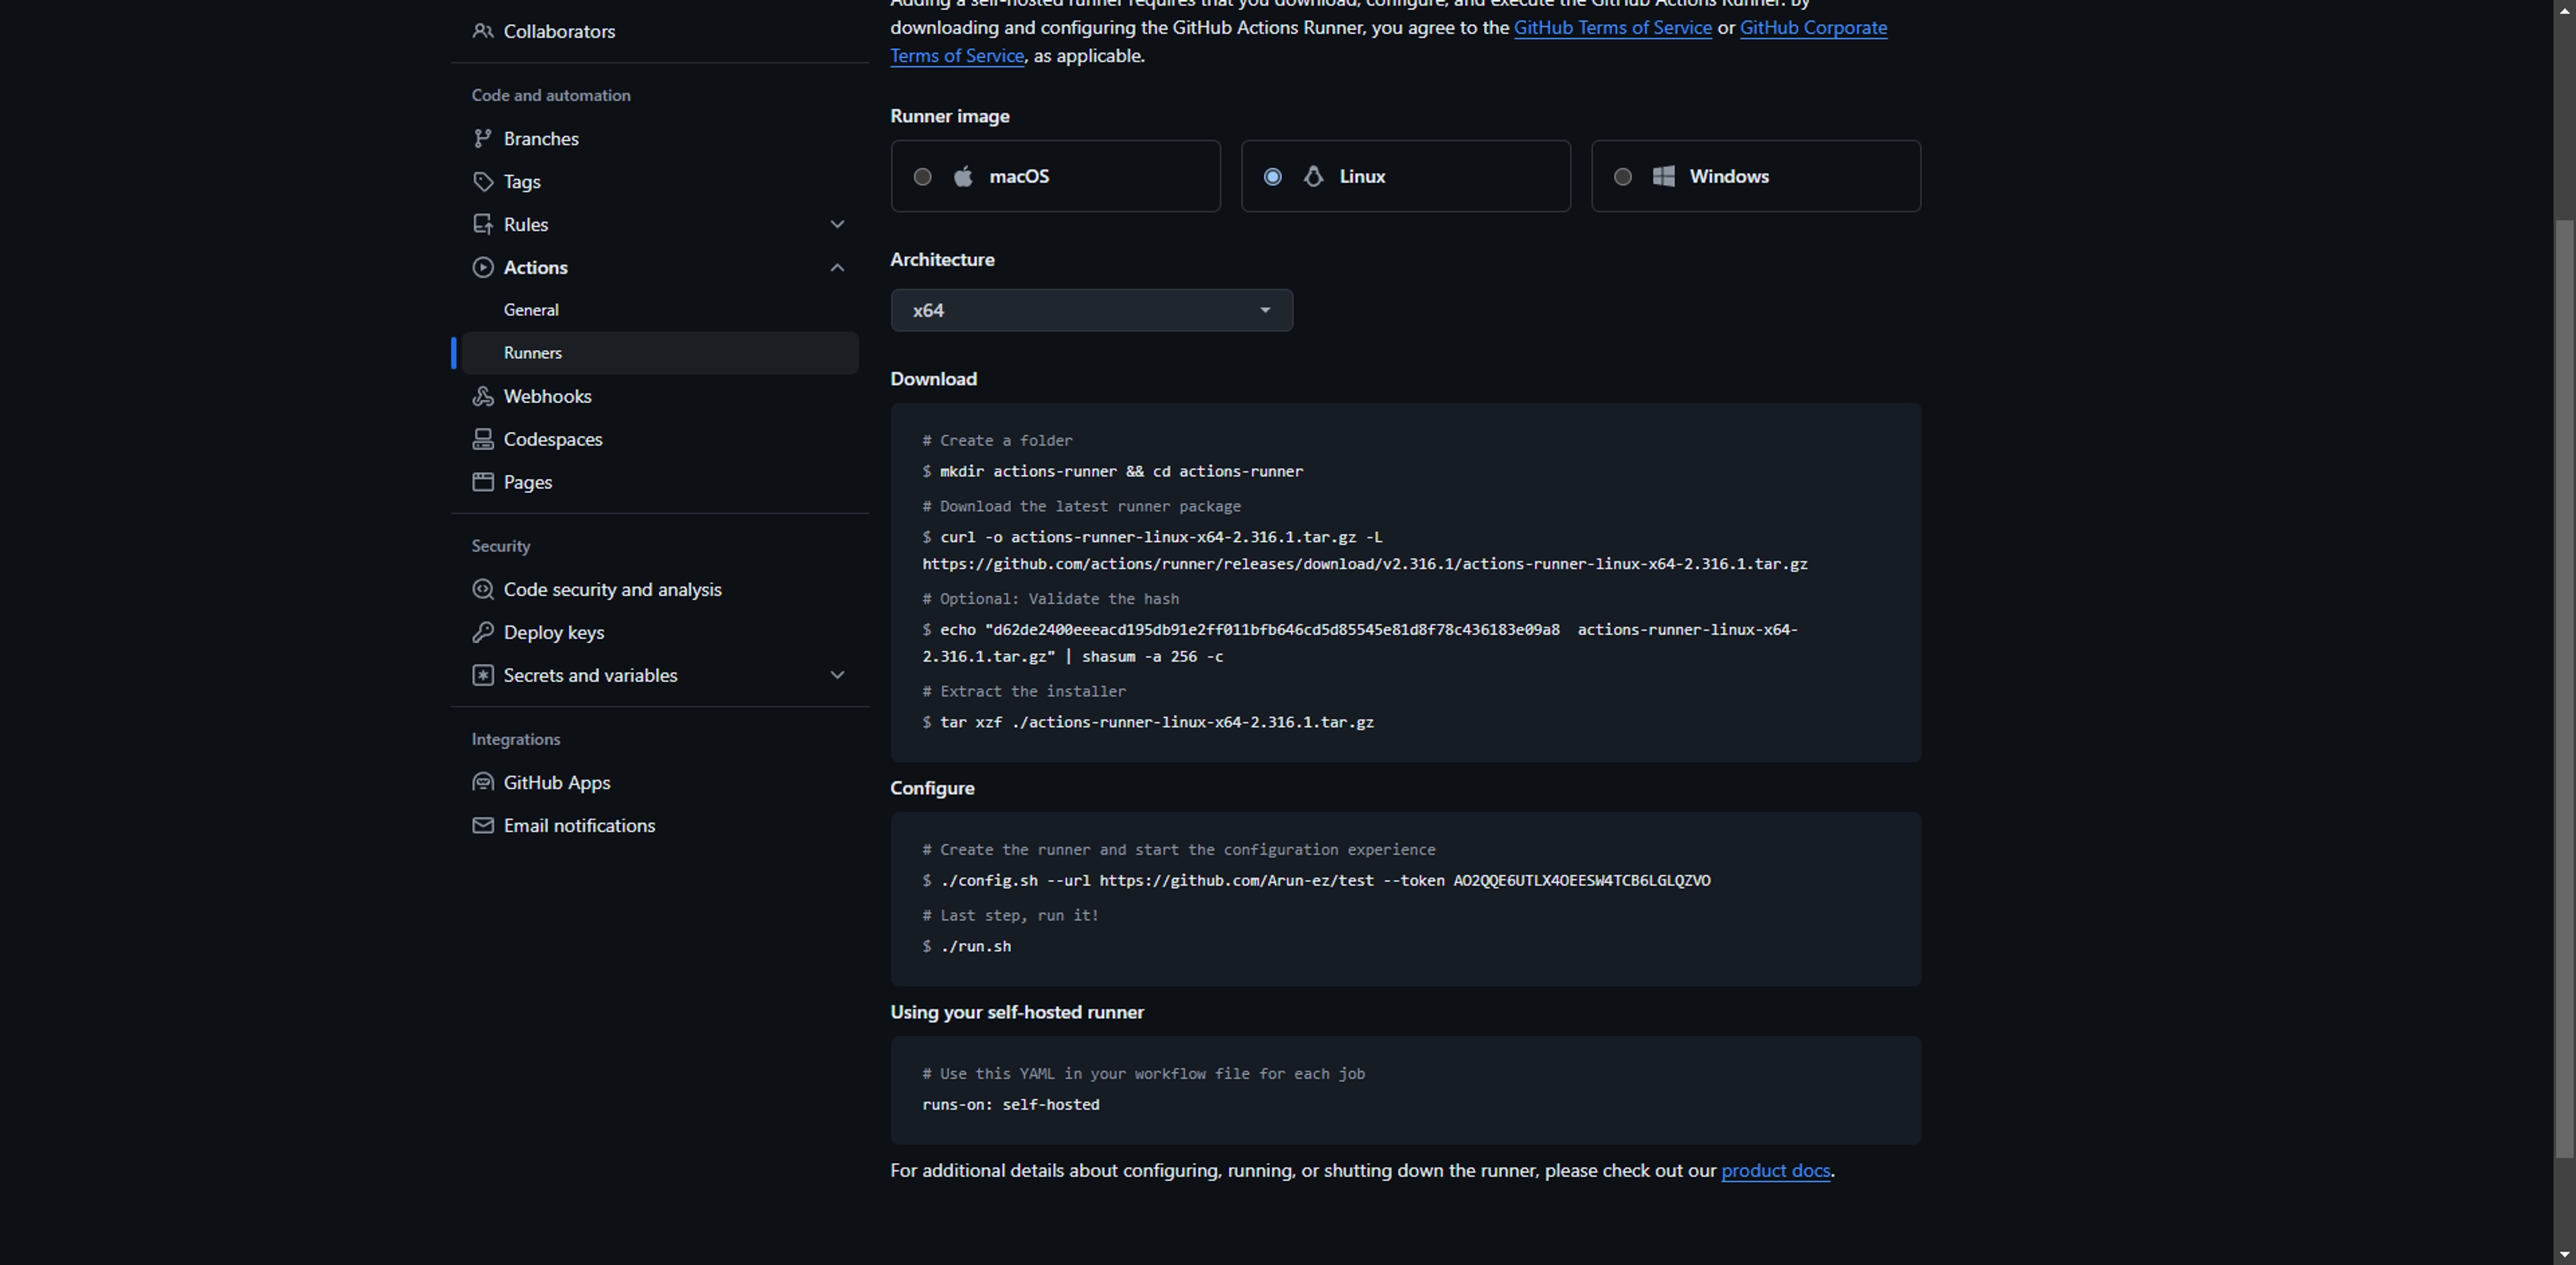
now run all the command one by one but Don't run the command ./run.sh and any other command after it.
In the last line it will ask to give names just hit enter to go with the default one
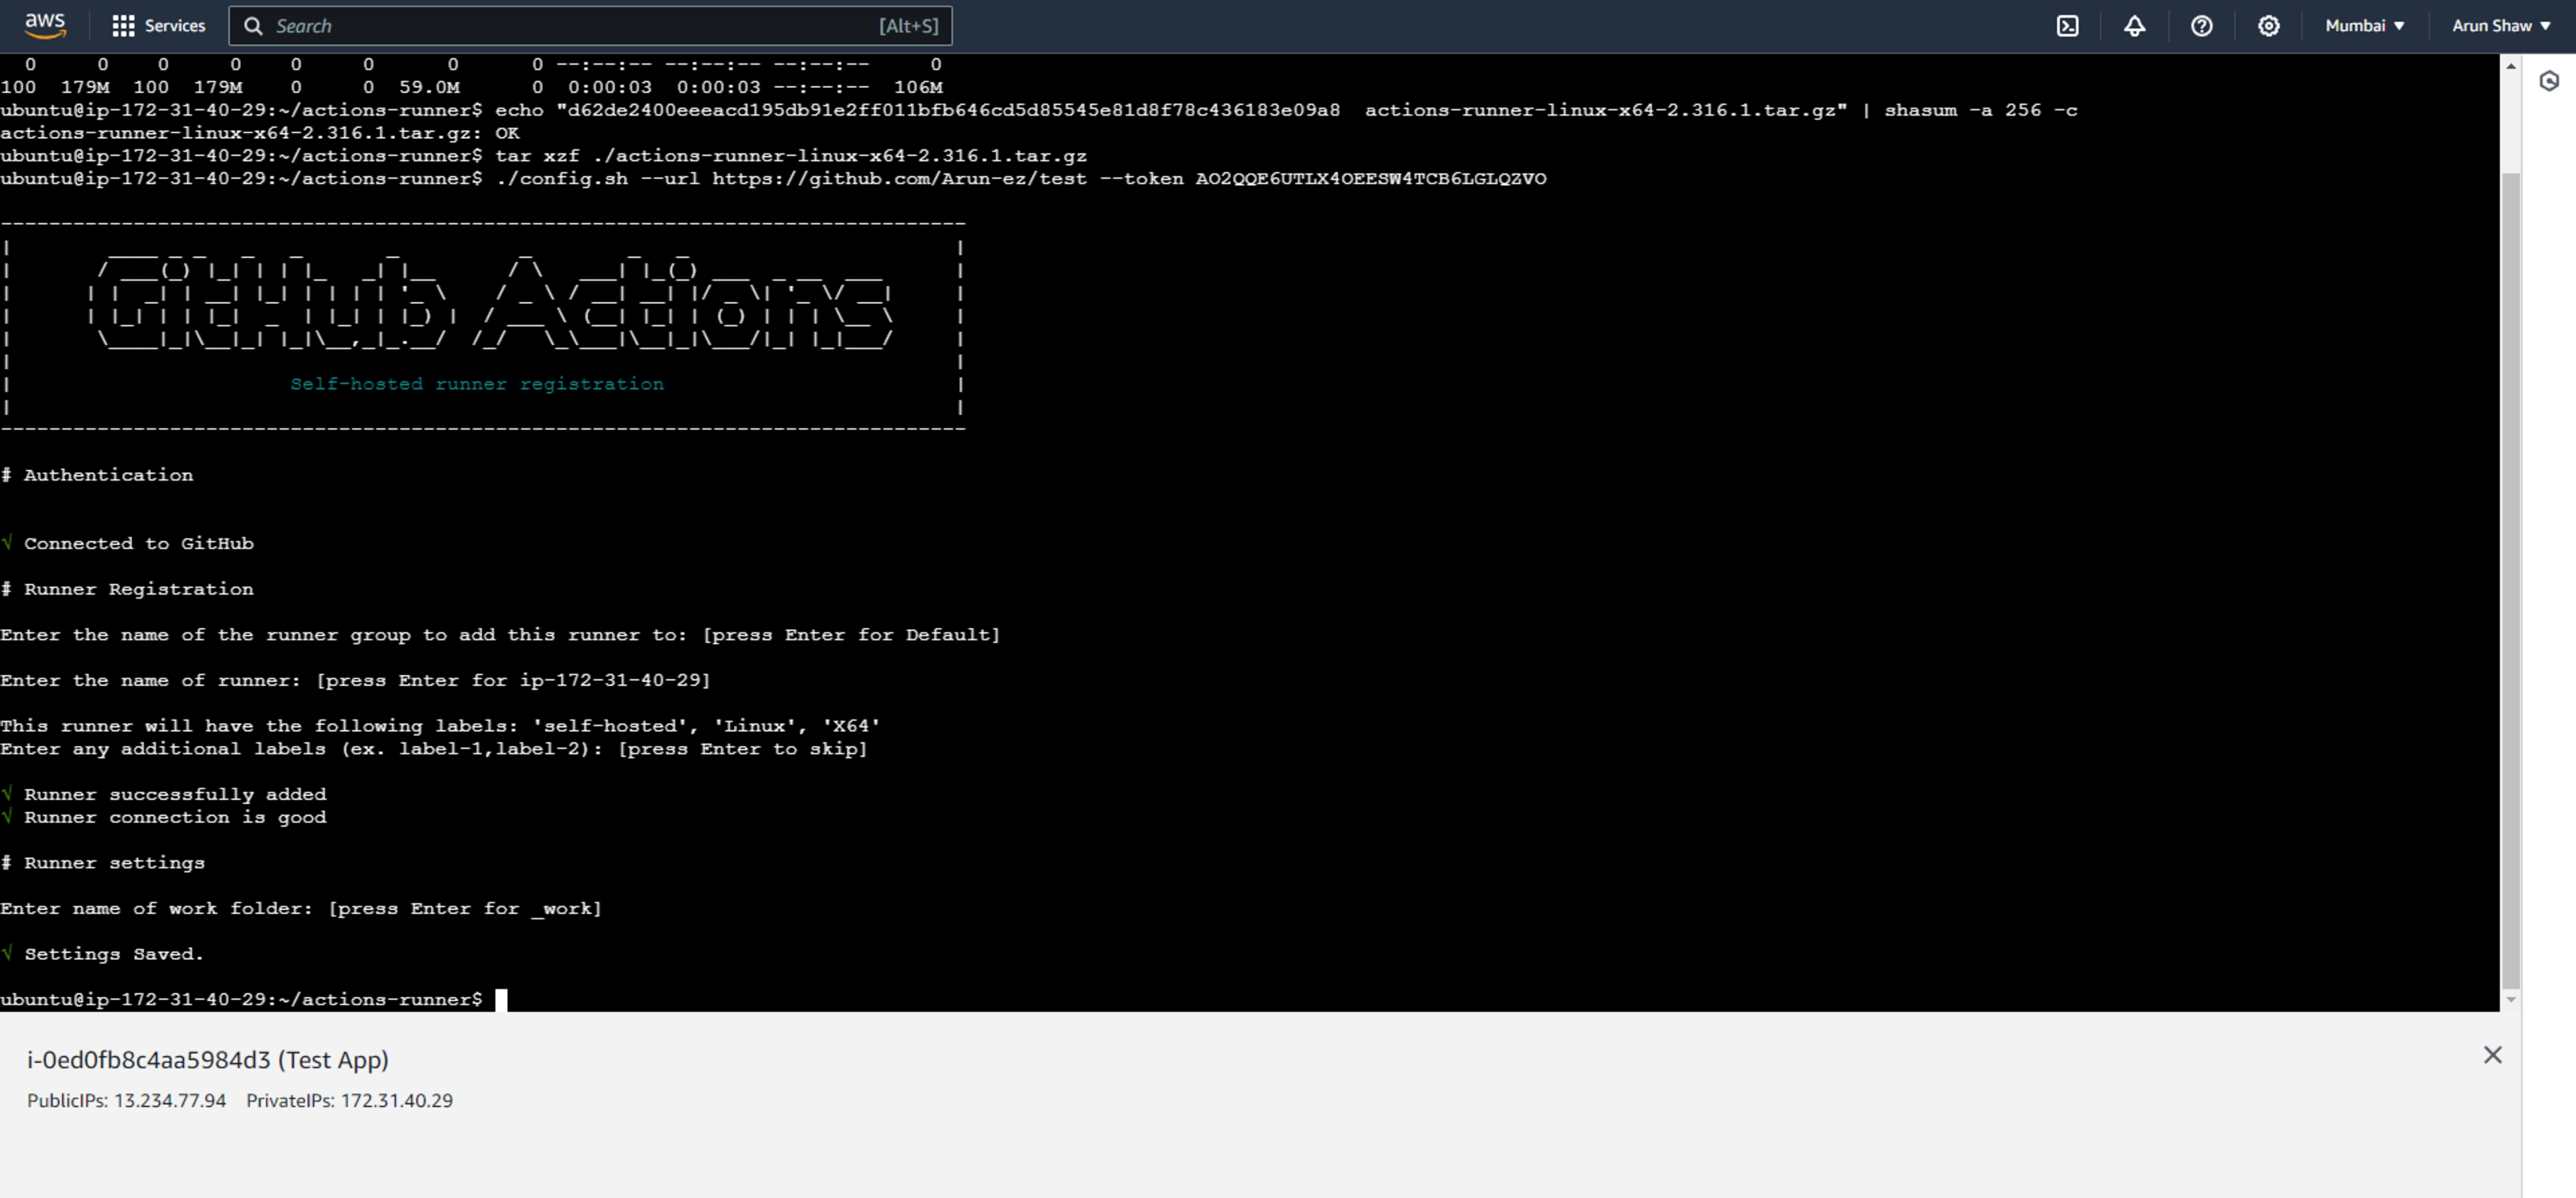
Now lets start our runner with the following commands
sudo ./svc.sh install sudo ./svc.sh start 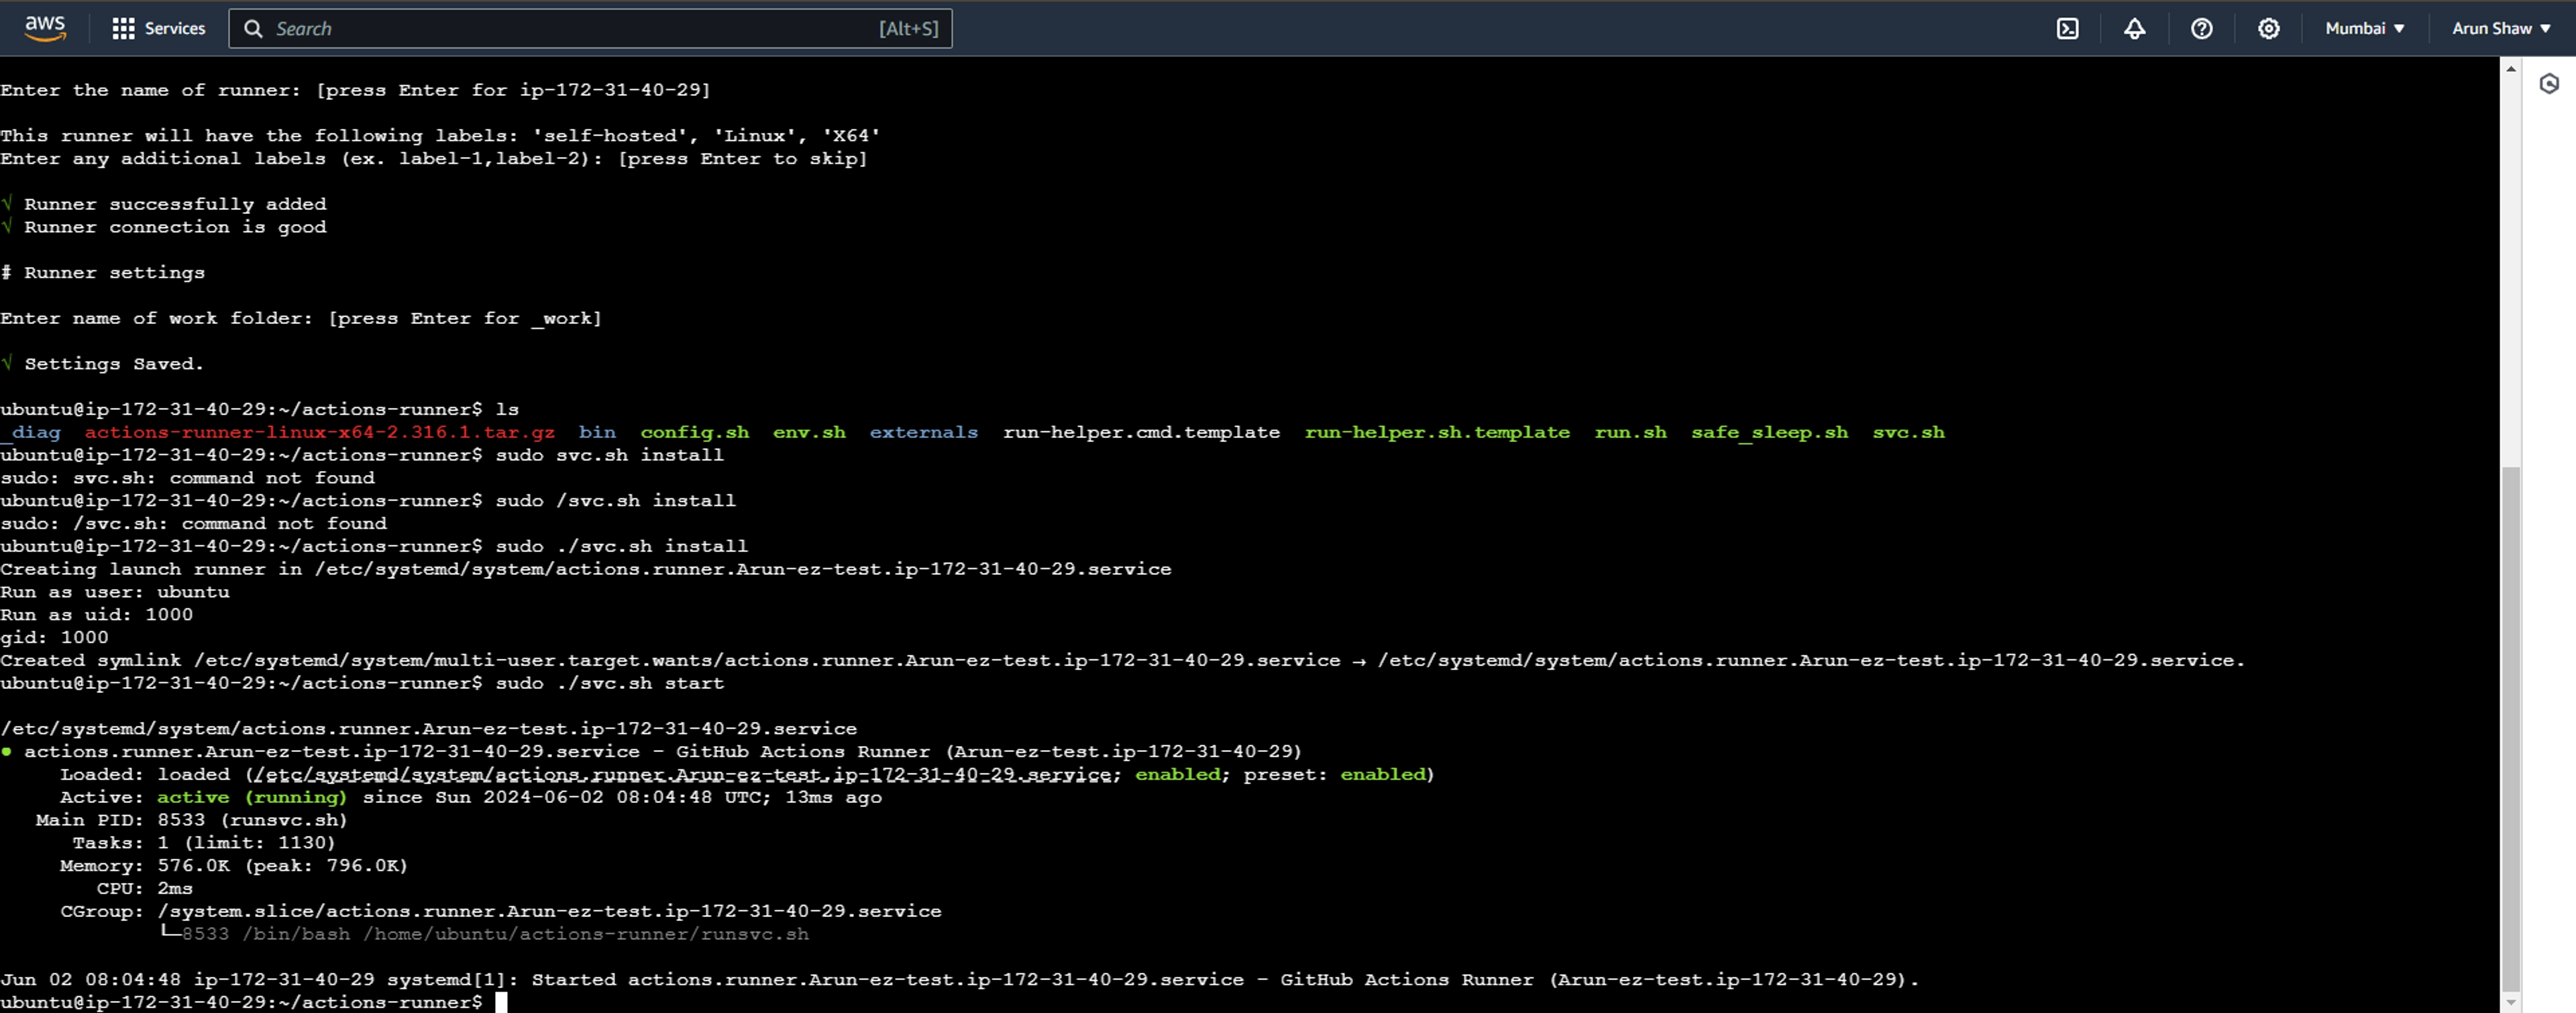
Go to Settings > Actions > Runners

Lets add a github workflow
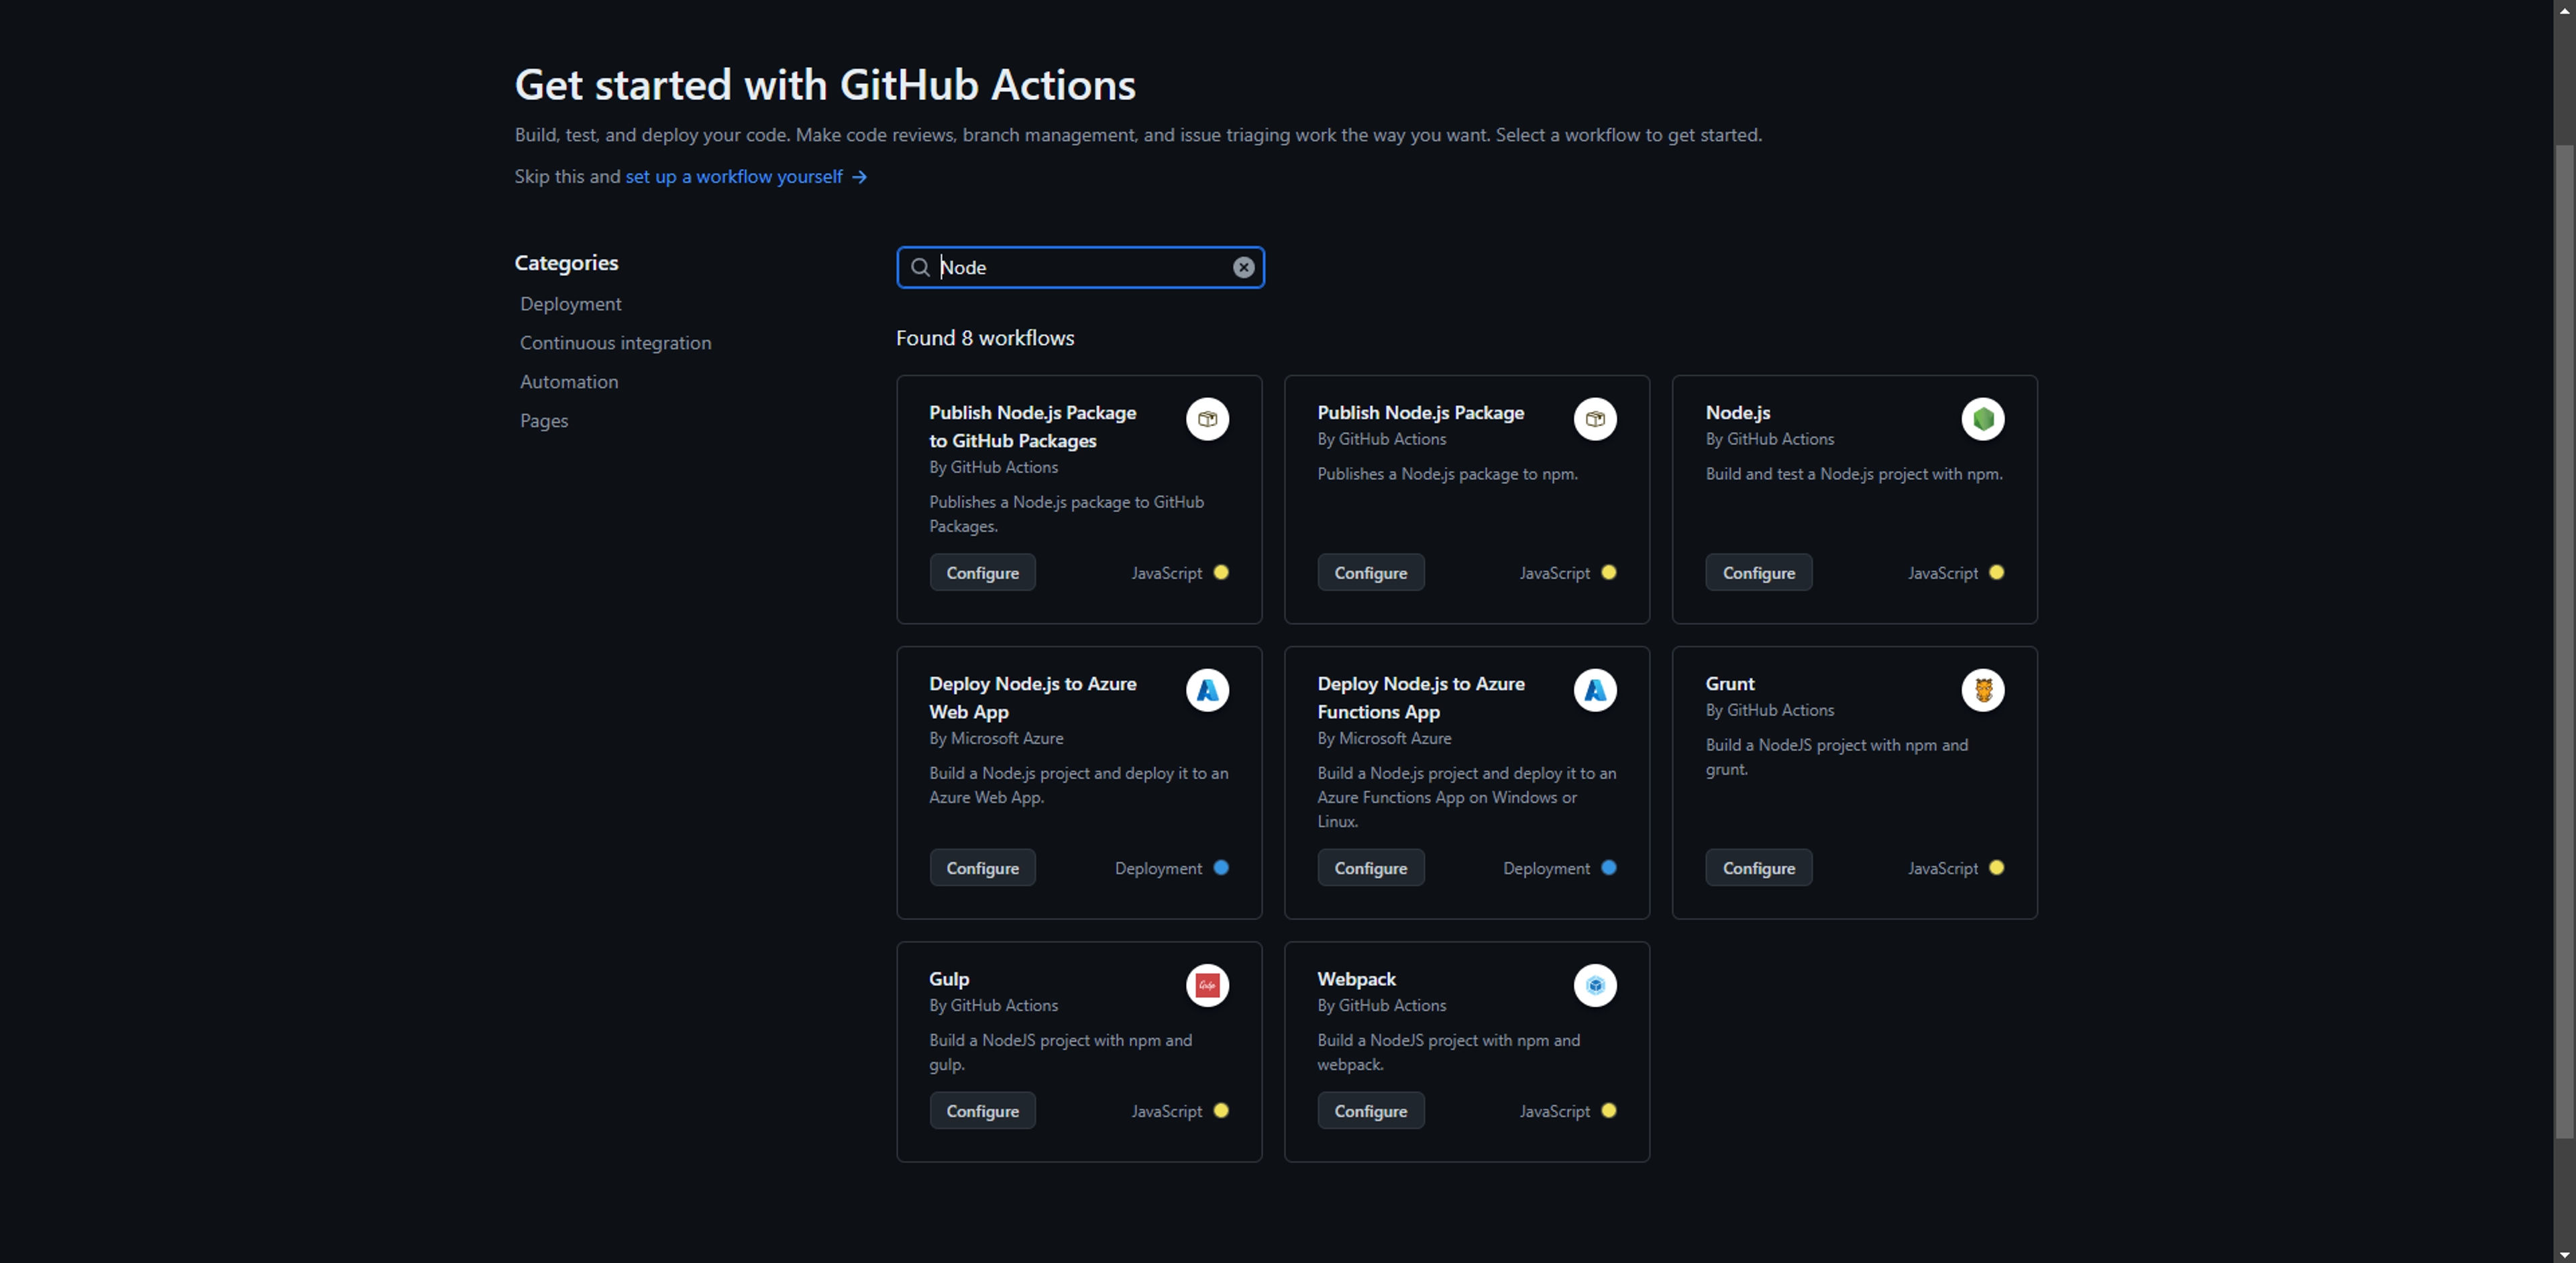
Go to Actions Tab from topbar and Search Node and there you get a workflow with the name NodeJs click on configure and Setup the file like this and commit the changes.
 name: Node.js CI/CD

on:
  push:
    branches: [ "master" ] #provide your branch name
  pull_request:
    branches: [ "master" ] #provide your branch name

jobs:
  build:

    runs-on: self-hosted

    strategy:
      matrix:
        node-version: [20.x] #Give the installed nodejs version of EC2

    steps:
    - uses: actions/checkout@v4
    - name: Use Node.js ${{ matrix.node-version }}
      uses: actions/setup-node@v3
      with:
        node-version: ${{ matrix.node-version }}
        cache: 'npm'
    - run: npm ci
Go to Actions tab it should trigger a action
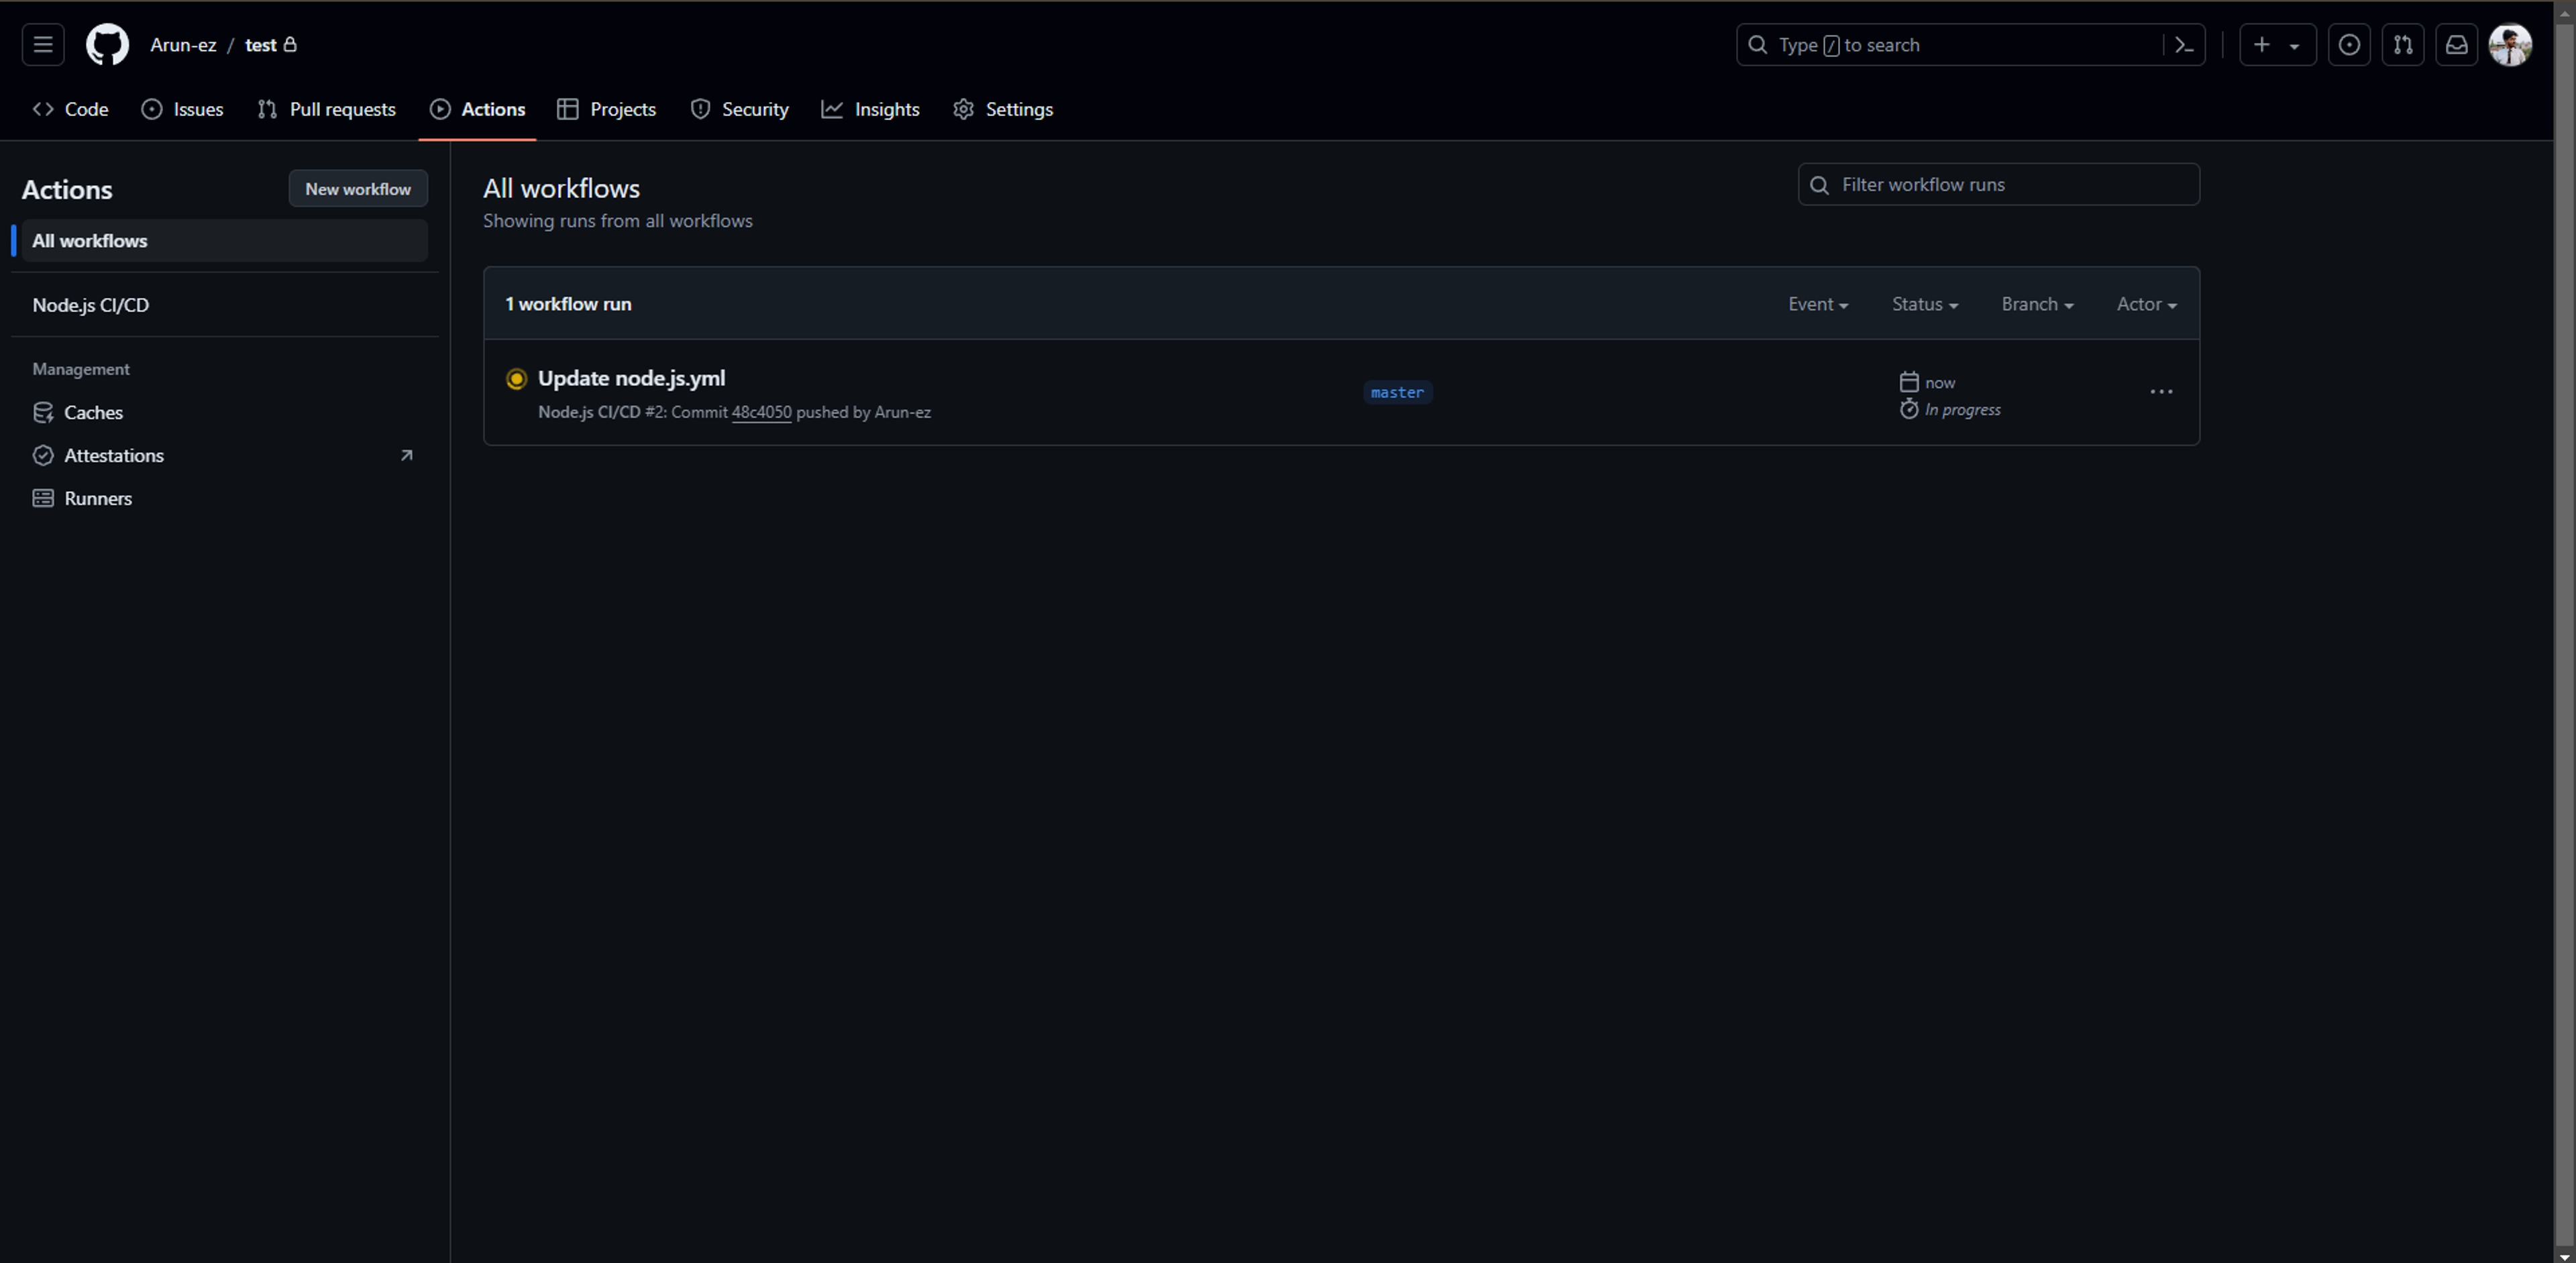
After some time a right tick will come here that means our code went to EC2 and now we can head over to out ec2 instance
ls -ls now you should see a folder _work there we will find our code
now run the command below
 cd _work/{your-github-repo-name}/{your-github-repo-name}

in my case it is--
// cd _work/test/test
Setup NGINX, PM2 and Custom Domain
Install nginx in ubuntu
sudo apt install nginx setup nginx configuration file as per out requirement
sudo nano /etc/nginx/sites-available/default Remove everything and change the file like this and press ctrl+o and press Enter to save and the ctrl+x to exit
 server {
        listen 80;
        client_max_body_size 100M;
        server_name www.example.com; #enter your domain

        location / {
             proxy_pass http://localhost:8080; #whatever port your app runs on
             proxy_http_version 1.1;
             proxy_set_header Upgrade $http_upgrade;
             proxy_set_header Connection 'upgrade';
             proxy_set_header Host $host;
             proxy_cache_bypass $http_upgrade;
        }
}
Check the configuration syntax is correct or not
sudo nginx -t lets reload nginx to make the changes effective
sudo nginx -s reload Now we have to add a DNS entry to our domain's dns provider with our public Ipv4 address of the ec2 instance
| Name | Type | Value |
| www (subdomain) | A | 13.234.77.94 ( Enter your ipv4 address ) |
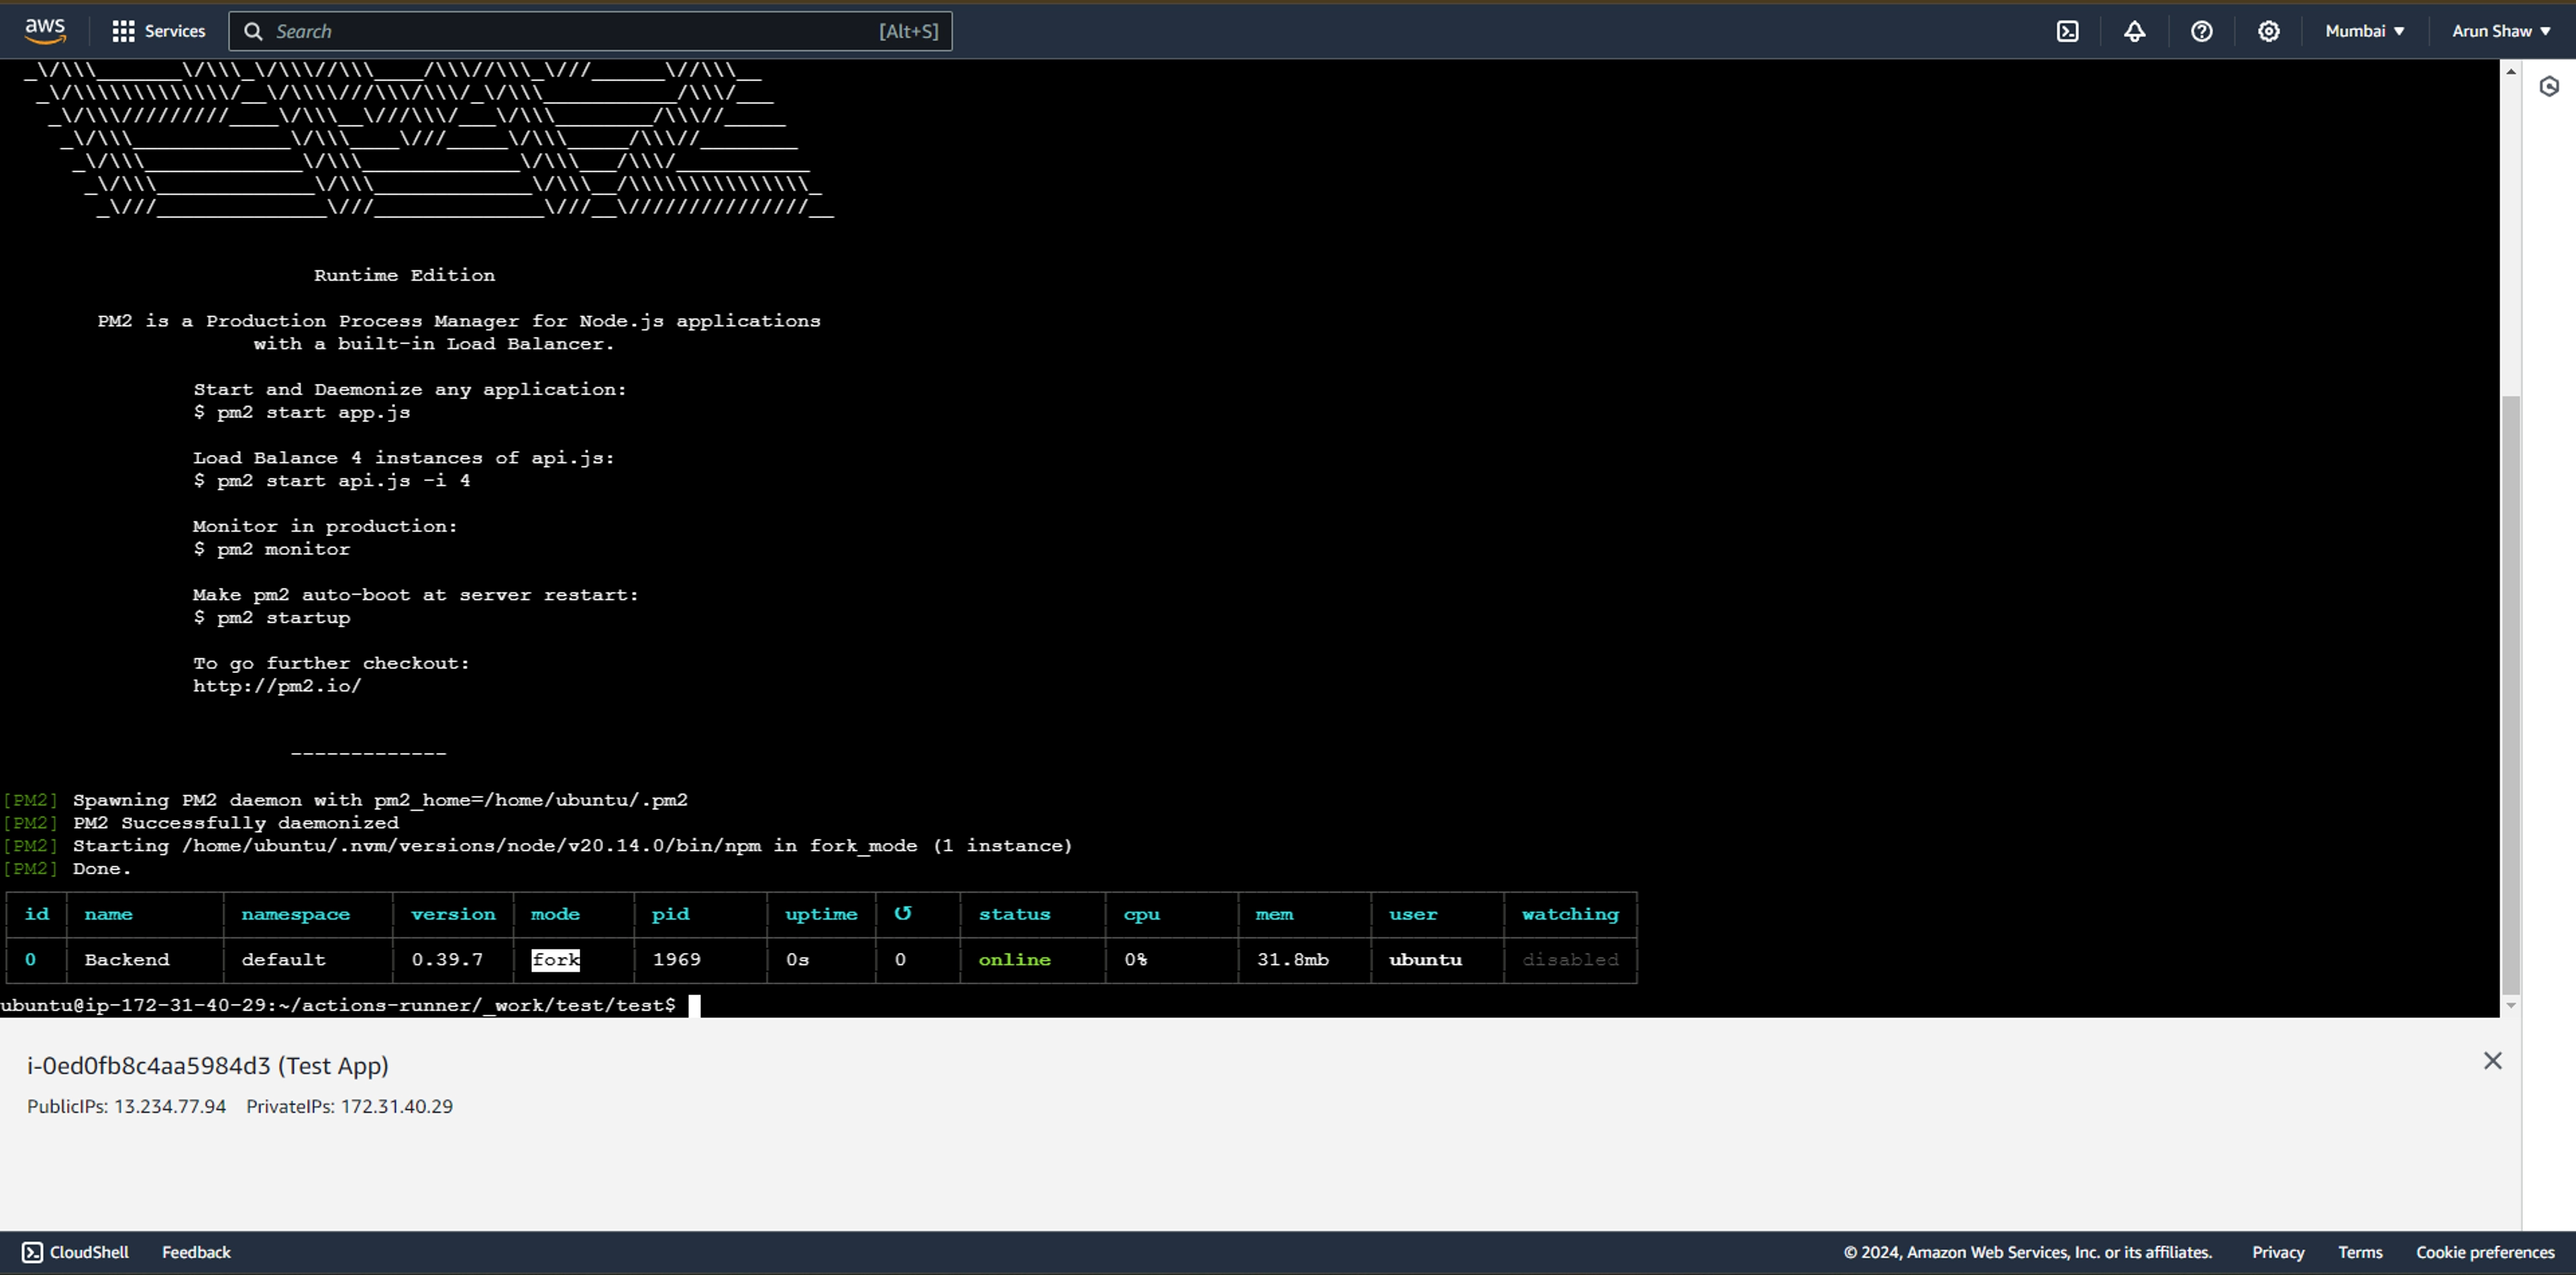
After all these we can now run our server with pm2. So lets install pm2
npm i -g pm2 Go to that directory where our code exist in my case it on on
actions-runner > _work > test > test
run the command and provide name whatever you want but you must remember it because we have to add it on our github workflow
pm2 start --name Backend npm -- start Server should start now and pm2 should show like this
Enable HTTPS(SSL) with Certbot
To enable https lets request a SSL certificate for the domain we have added.
sudo add-apt-repository ppa:certbot/certbot sudo apt-get install python3-certbot-nginx Run the below command and enter your email and press Y and Enter to accept terms and conditions.
sudo certbot --nginx -d www.yourdomain.com To set a renewal in a interval of 90 days run this
sudo certbot renew --dry-run Now the final step is just to make few changes in the github workflow file. Add the below line at the bottom and provide the same name that you have provided on the time of running the server
- run: pm2 restart Backend Now NodeJs Server is successfully deployed in AWS EC2 with CI/CD pipeline. If you still having doubts you can watch my video tutorial here